
Voice Assistant Integrations (Optional)
It is assumed that RainMaker has already been deployed in your AWS Account. Please create a user via the RainMaker phone app(or your customized apps) and associate a node with the user before proceeding.
Supported Voice Assistant integrations.
- RainMaker Node control via Alexa through Smart Home skills.
- RainMaker Node control via Google Voice Assistant through Smart Home Actions.
Creating the skills/action
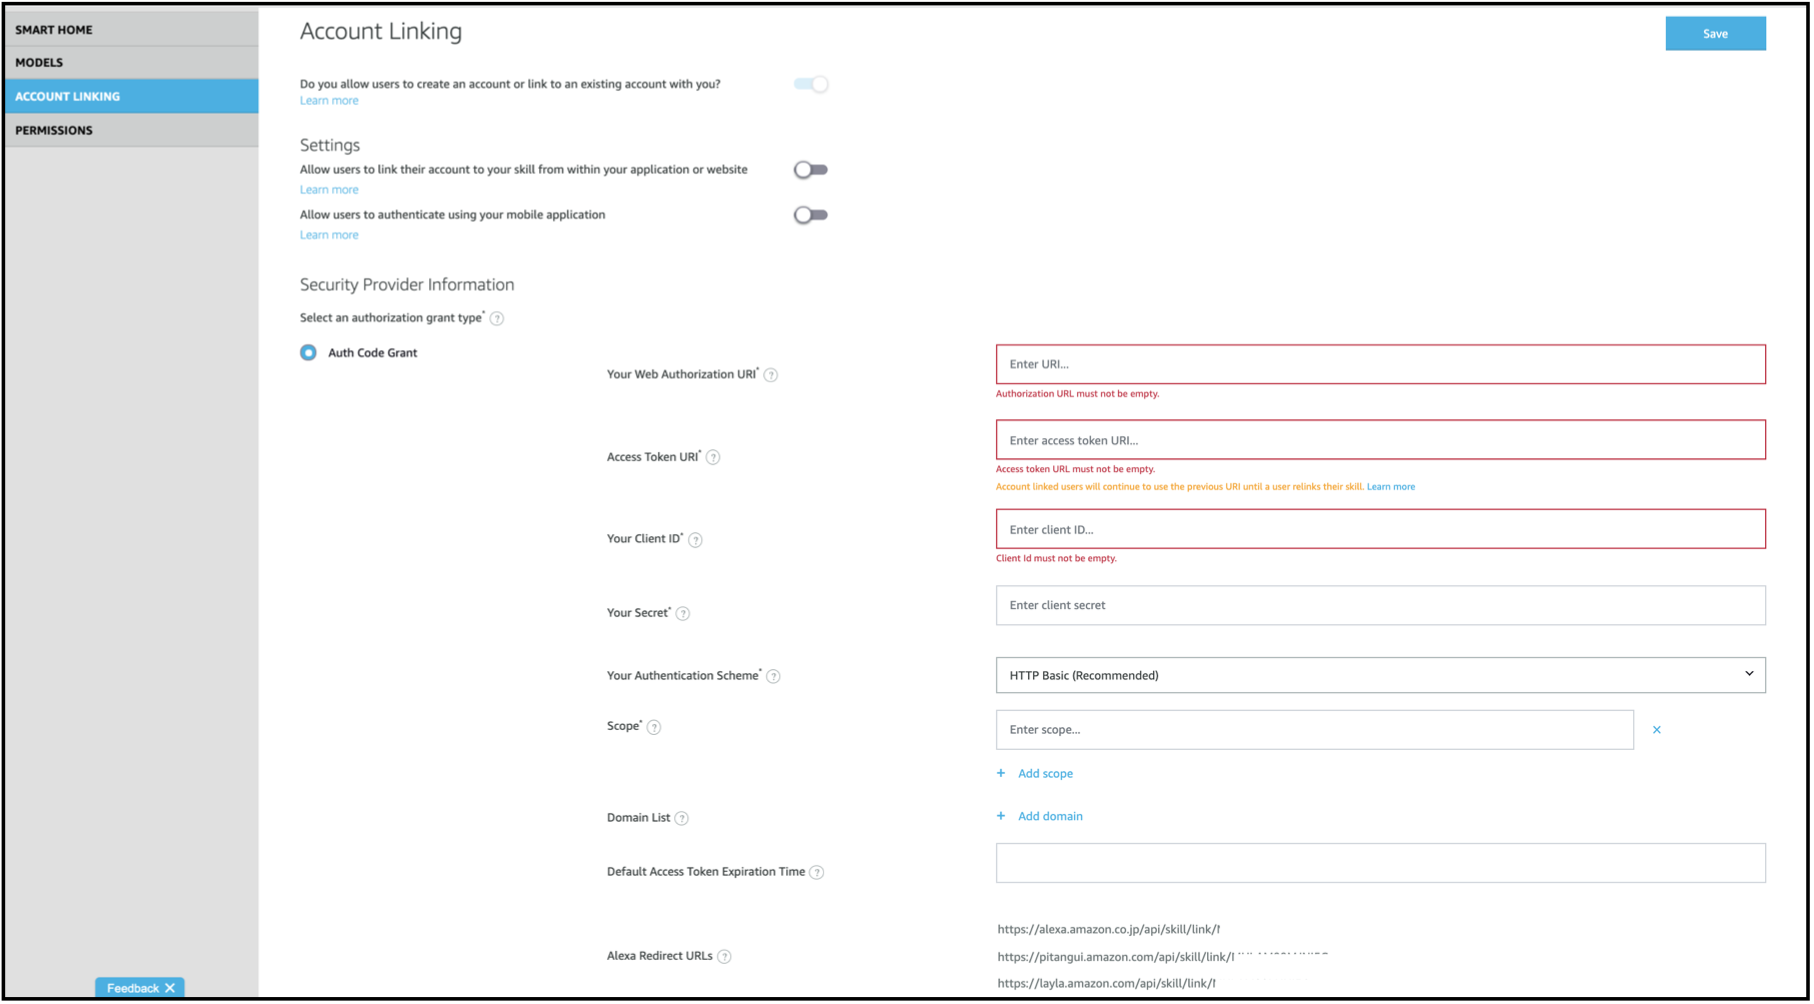
Create an Alexa Smart Home Skill
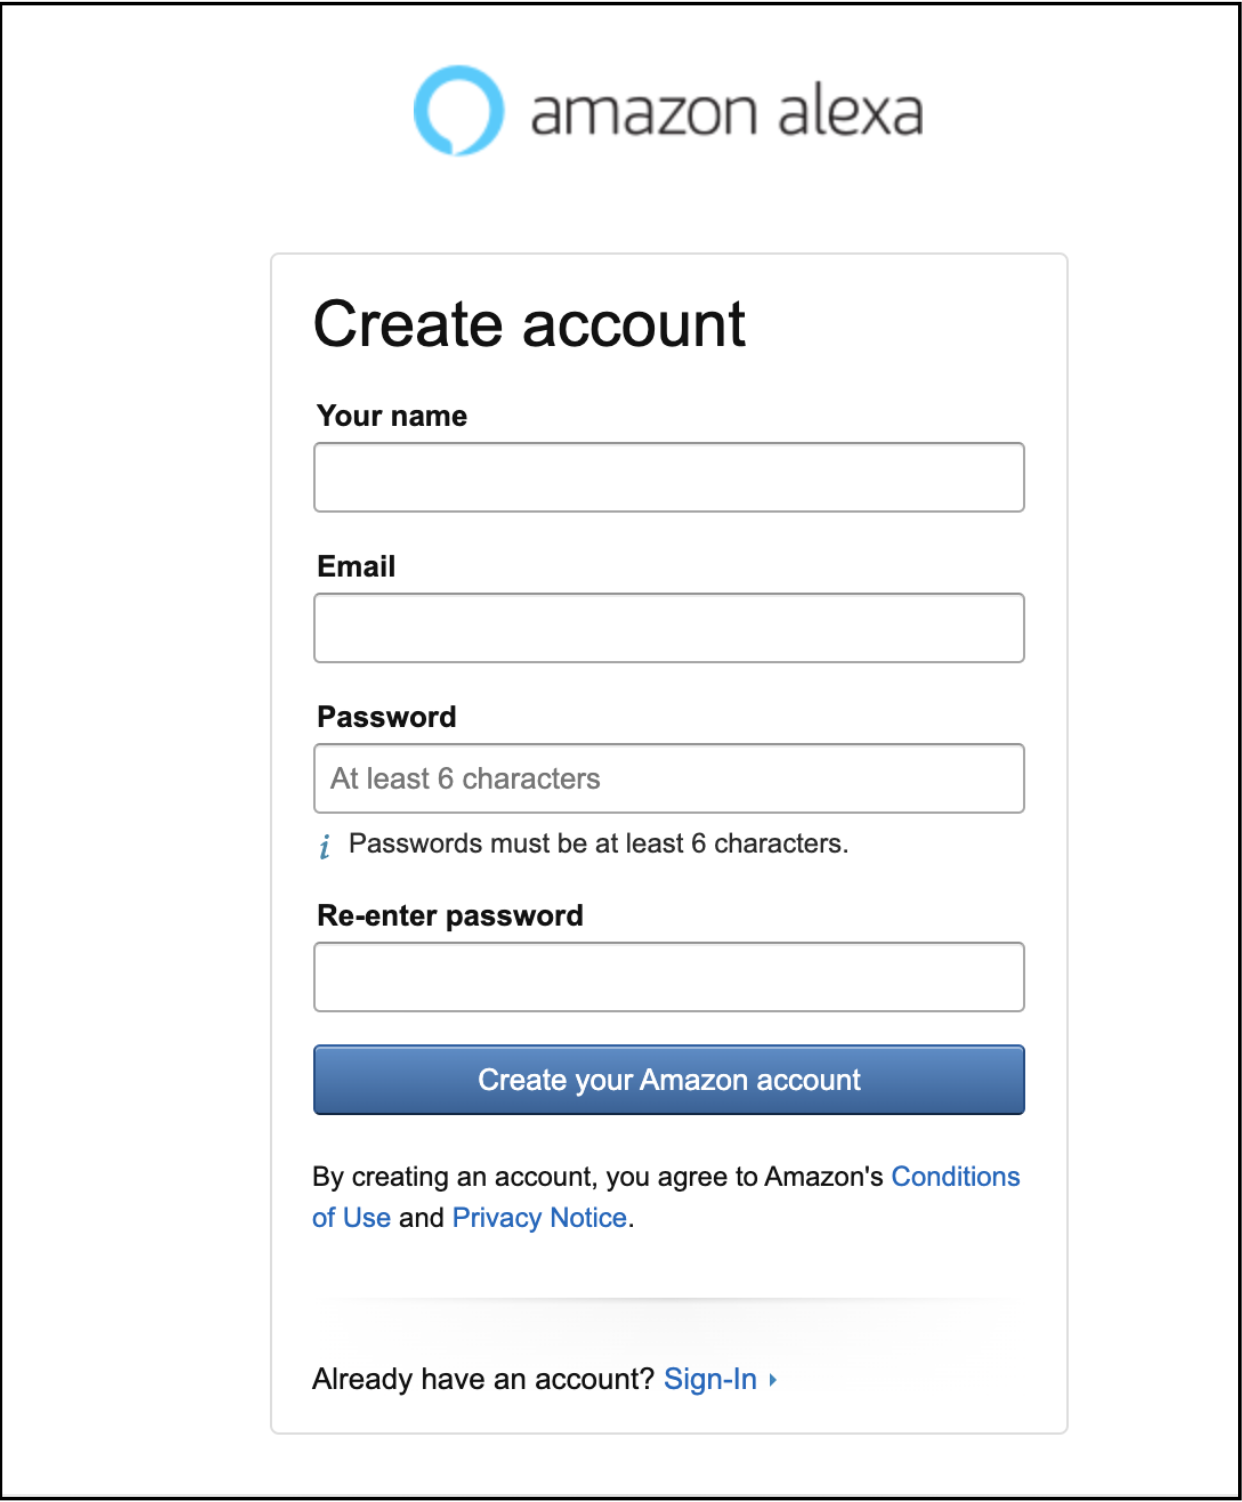
- Create an Amazon Alexa developer account.
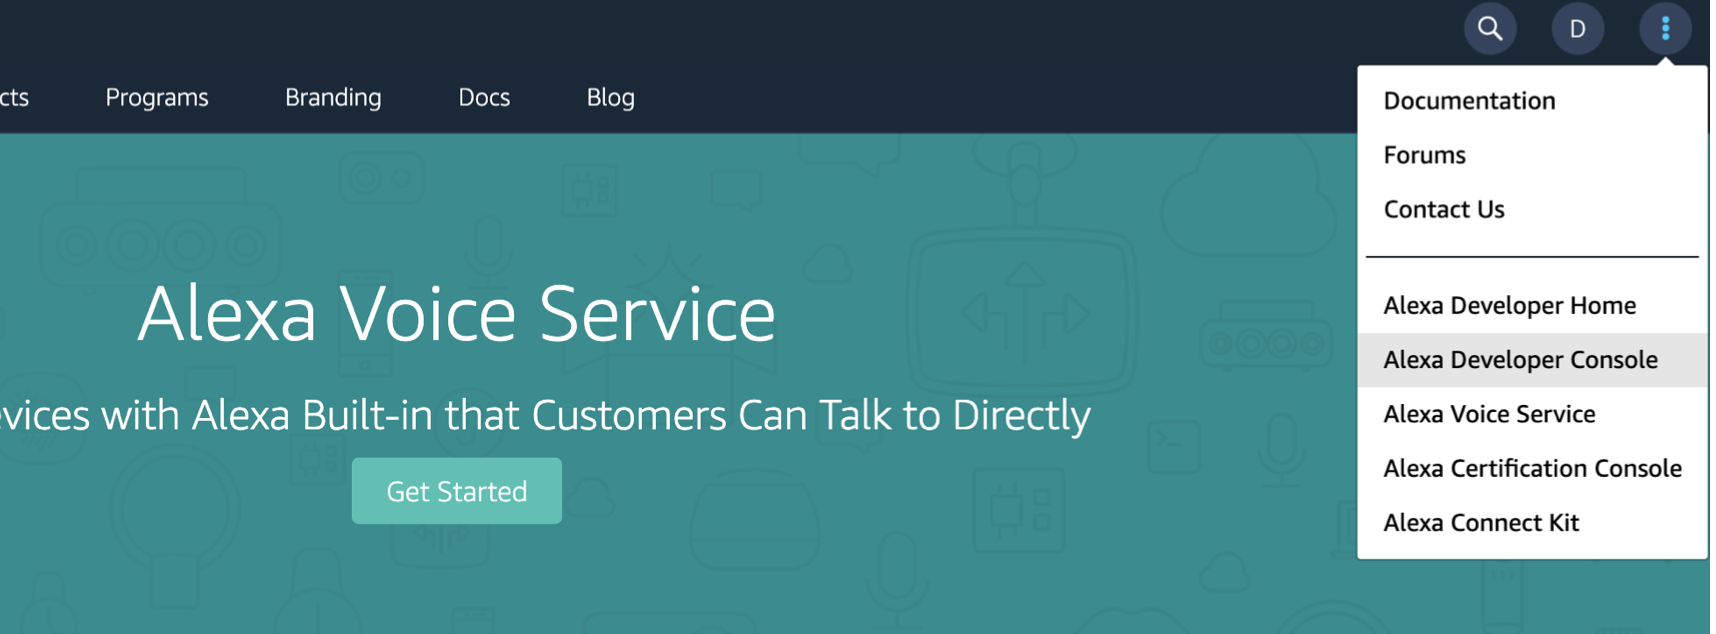
- Go to the Alexa Developer Console.
- Create a new skill with the Smart Home option.
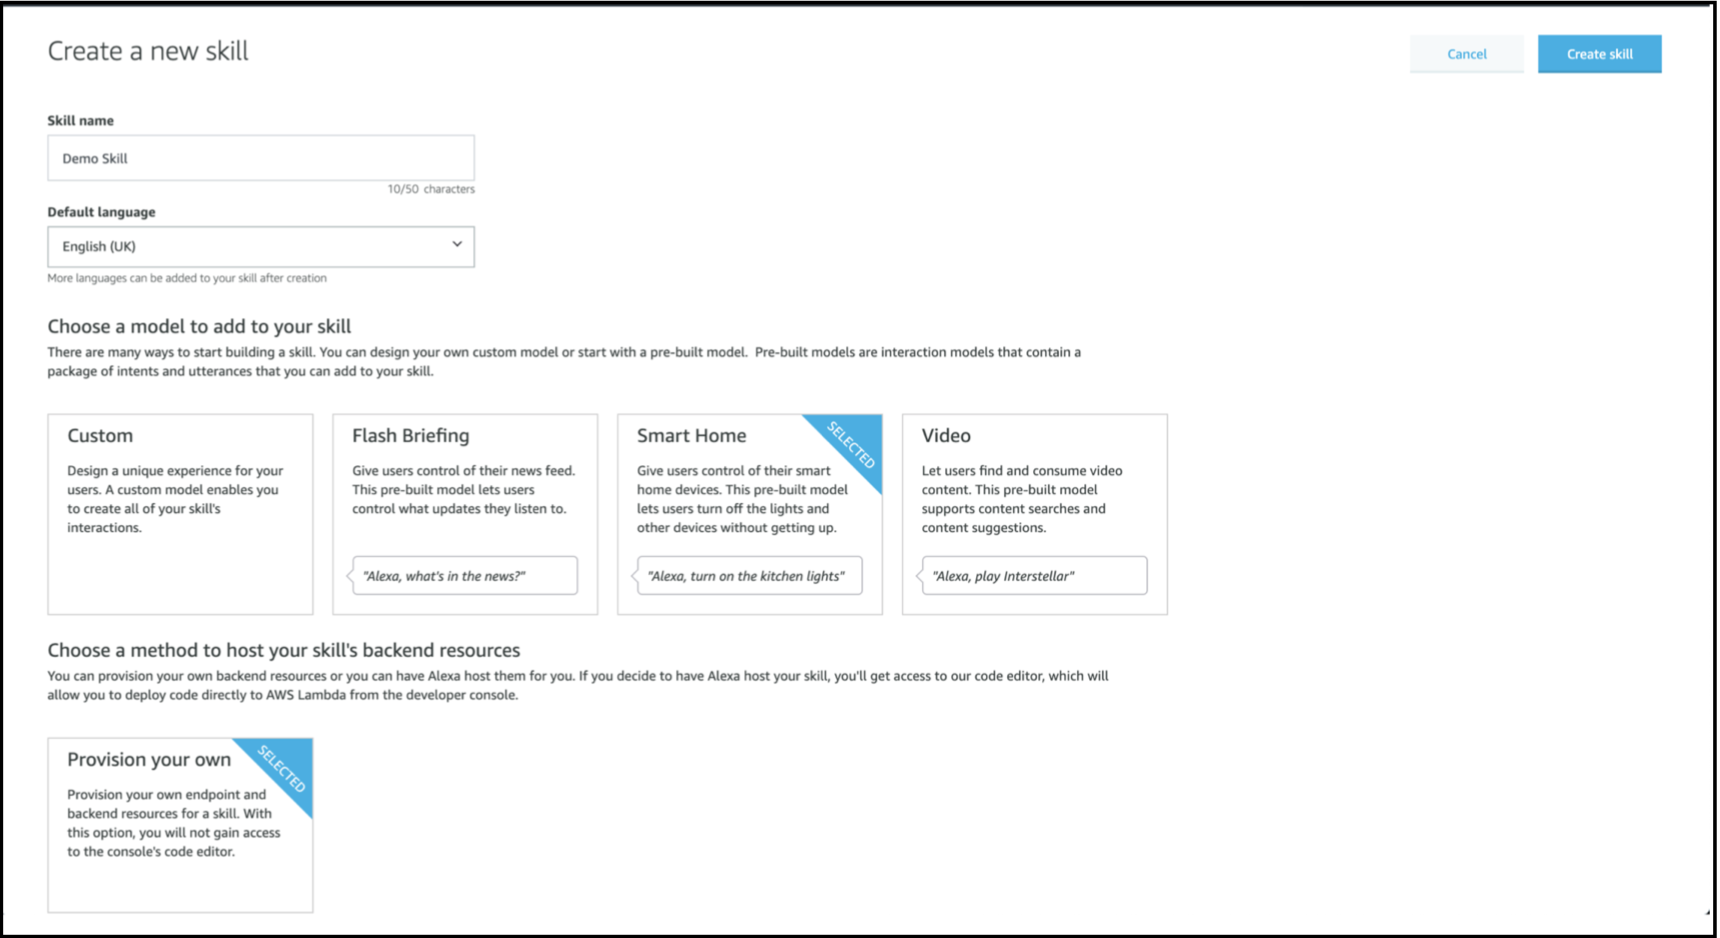
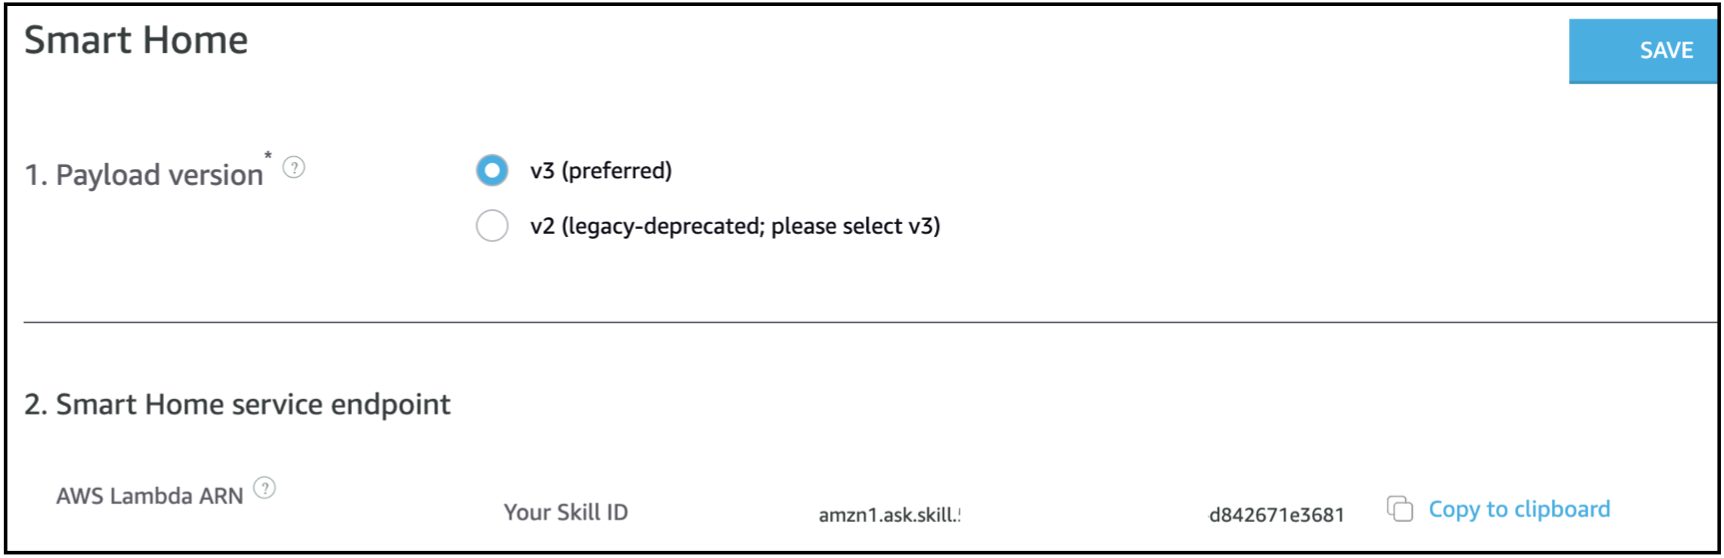
- Note your Skill ID. It will be used to create to add a smart home trigger for the Alexa Skill Lambda.
- Click on the Account Linking tab on the left nav-bar and note down the Alexa Redirect URLs at the bottom. These will be used as the Callback URLs for Alexa.
Create a Google Smart Home Action
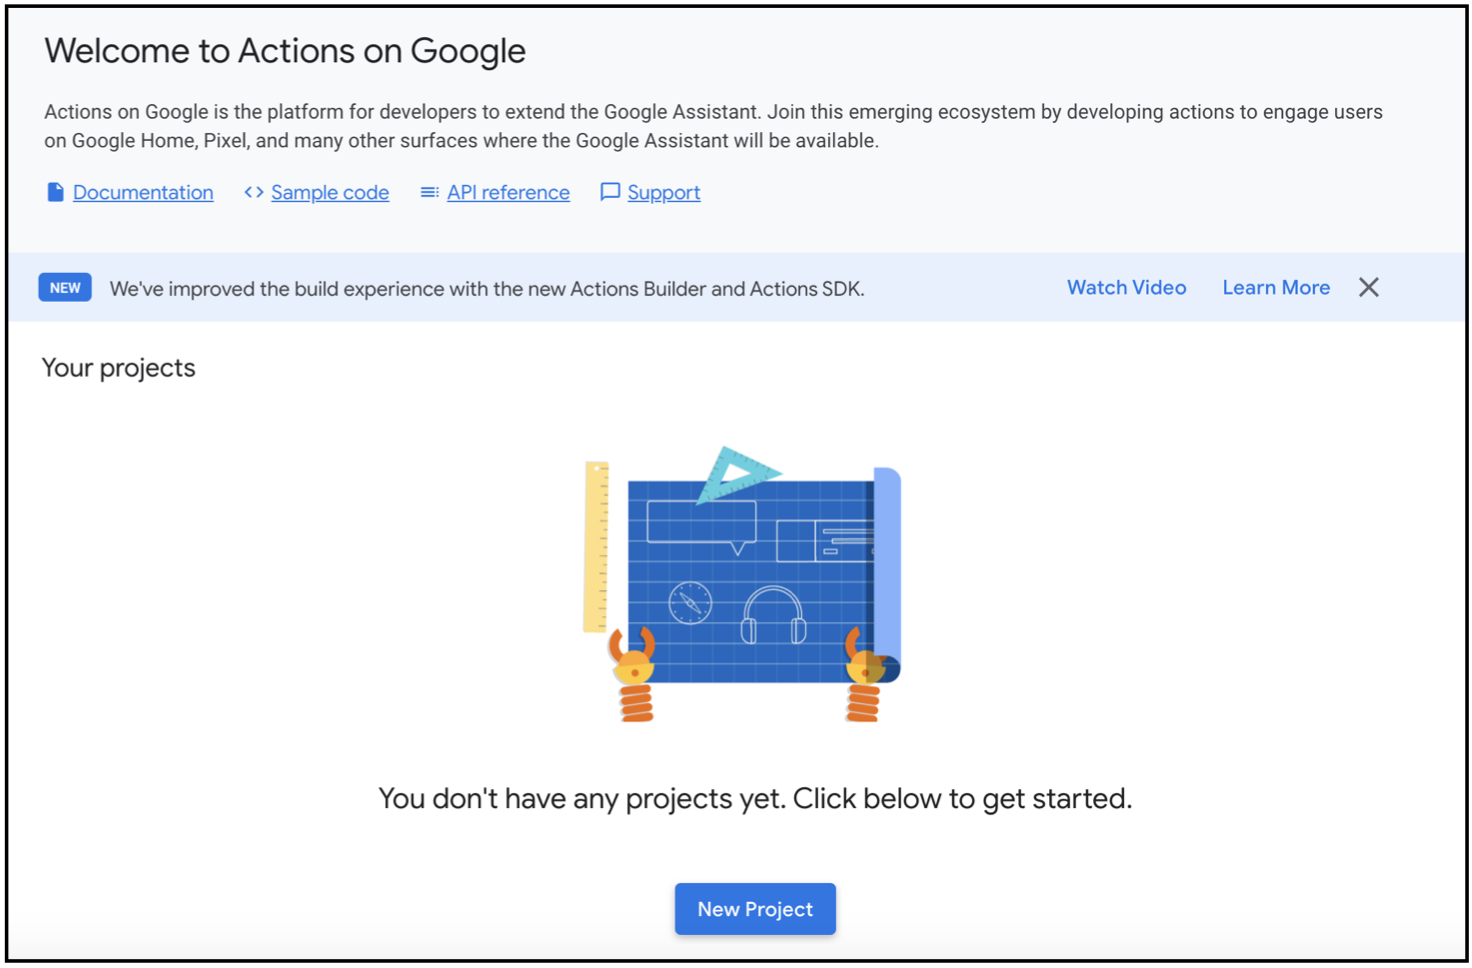
Log into your Google Account on the Google Developers website.
Create a New project on the Google Actions Console.
If you have never created the Google Actions Project before, the below screen will be displayed.
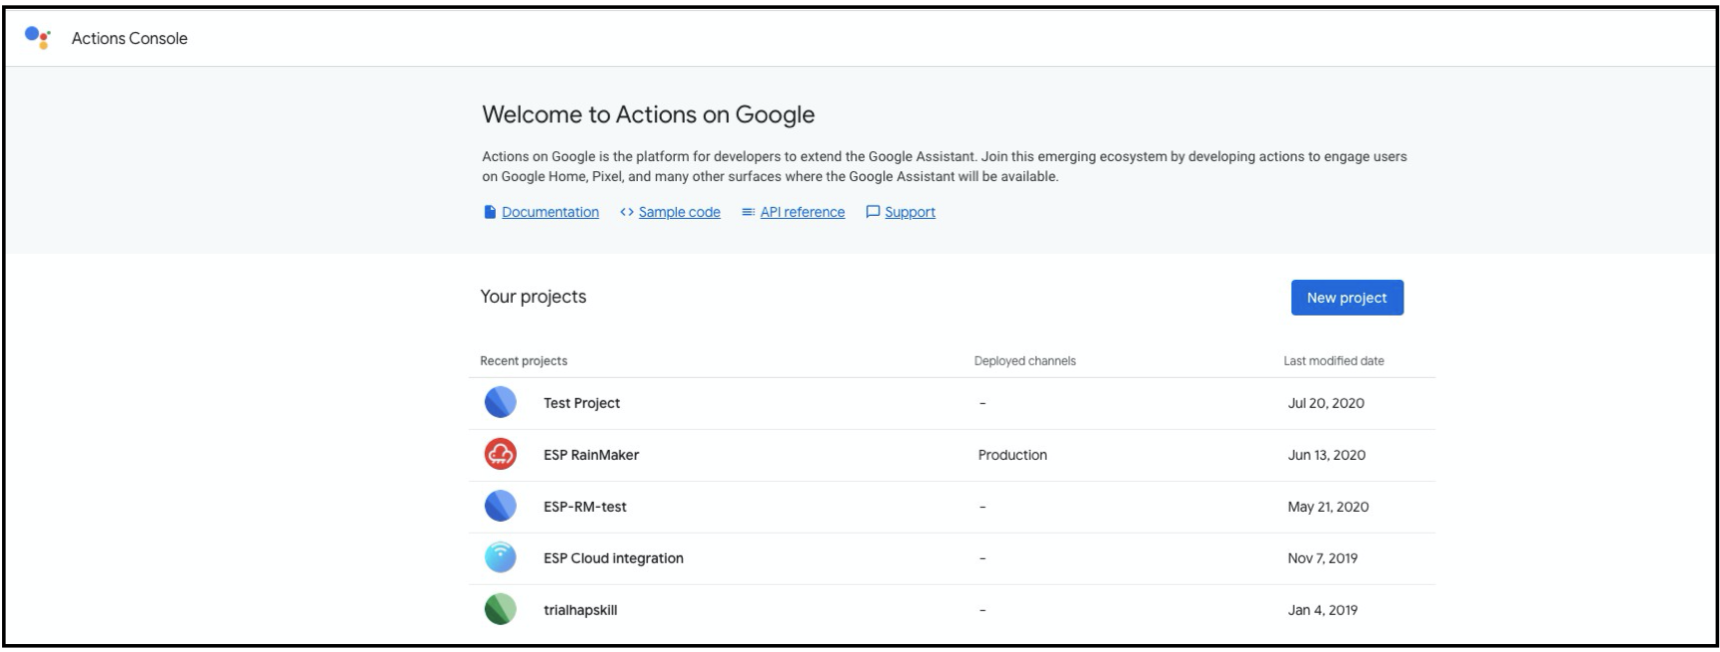
- Alternately, if you have already created a Google Actions Project, a screen like the below one will be displayed.
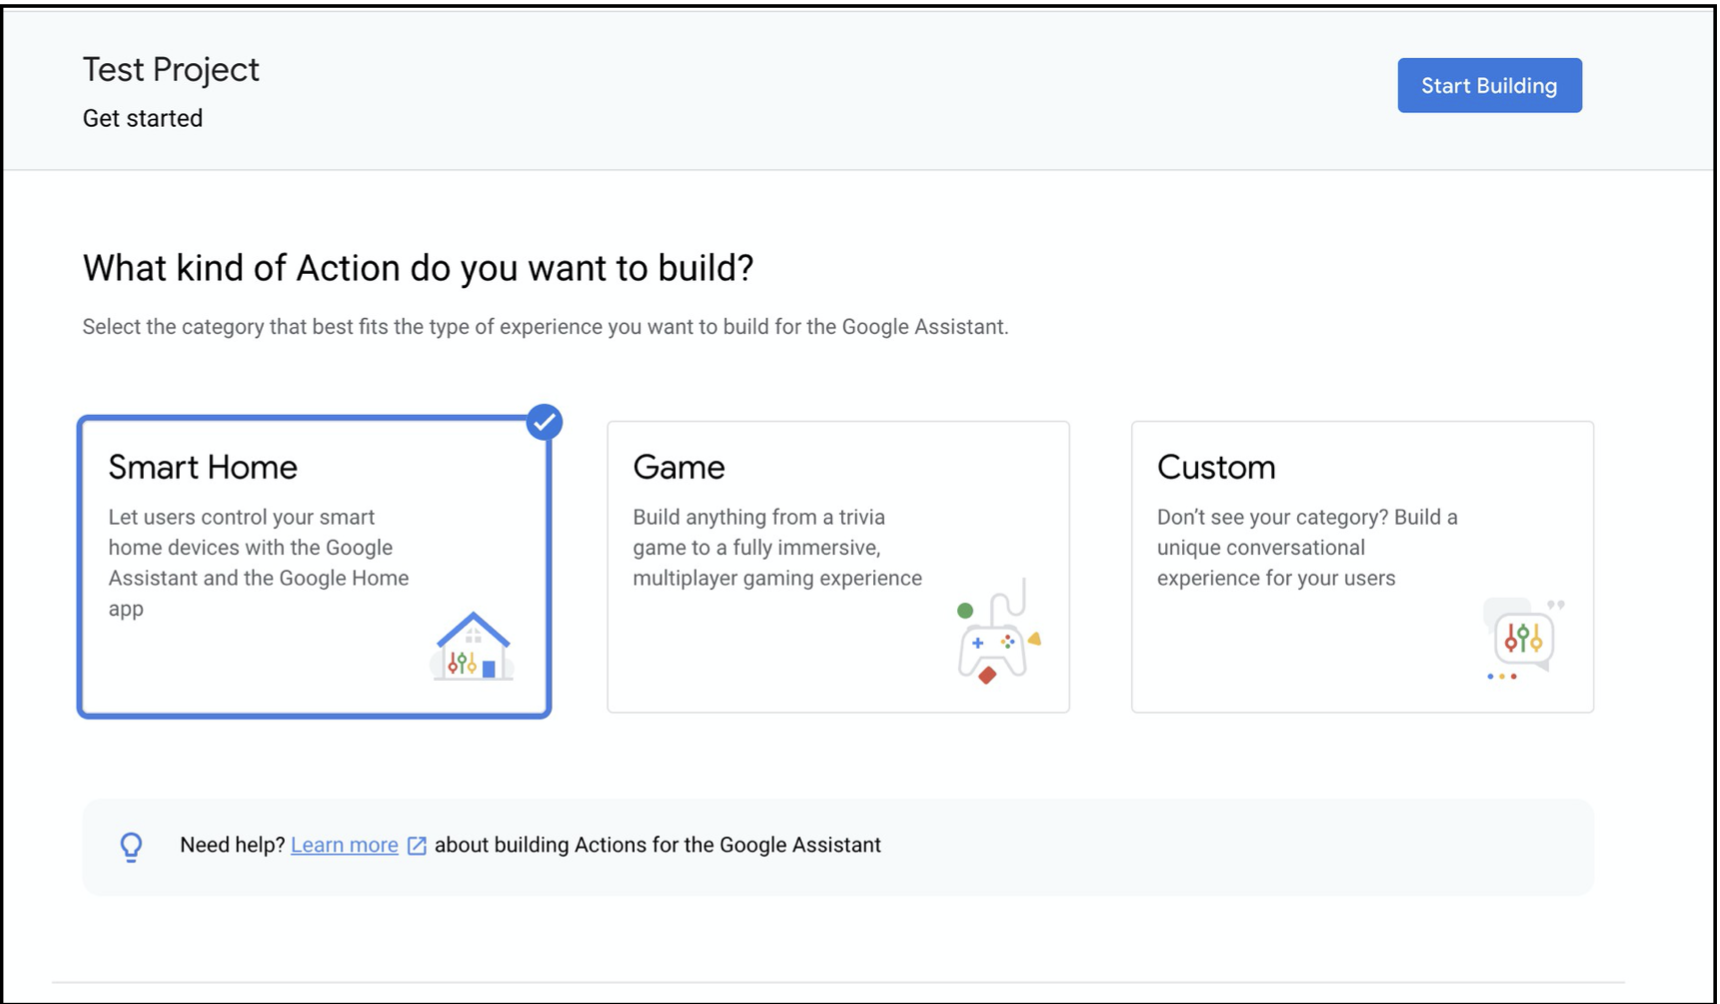
- Select the Smart Home option for the Project and click on Start Building.
- Note down the Project ID from Project Settings.
- The callback URL for your Google Action will be
https://oauth-redirect.googleusercontent.com/r/<project-id>.
Creating the AWS Cognito App Clients for Alexa and Google Voice Assistant
Pre-requisites to Deploy SAR Application
- Ensure that Cognito domain is created using steps given in Cognito Domain Configurations.

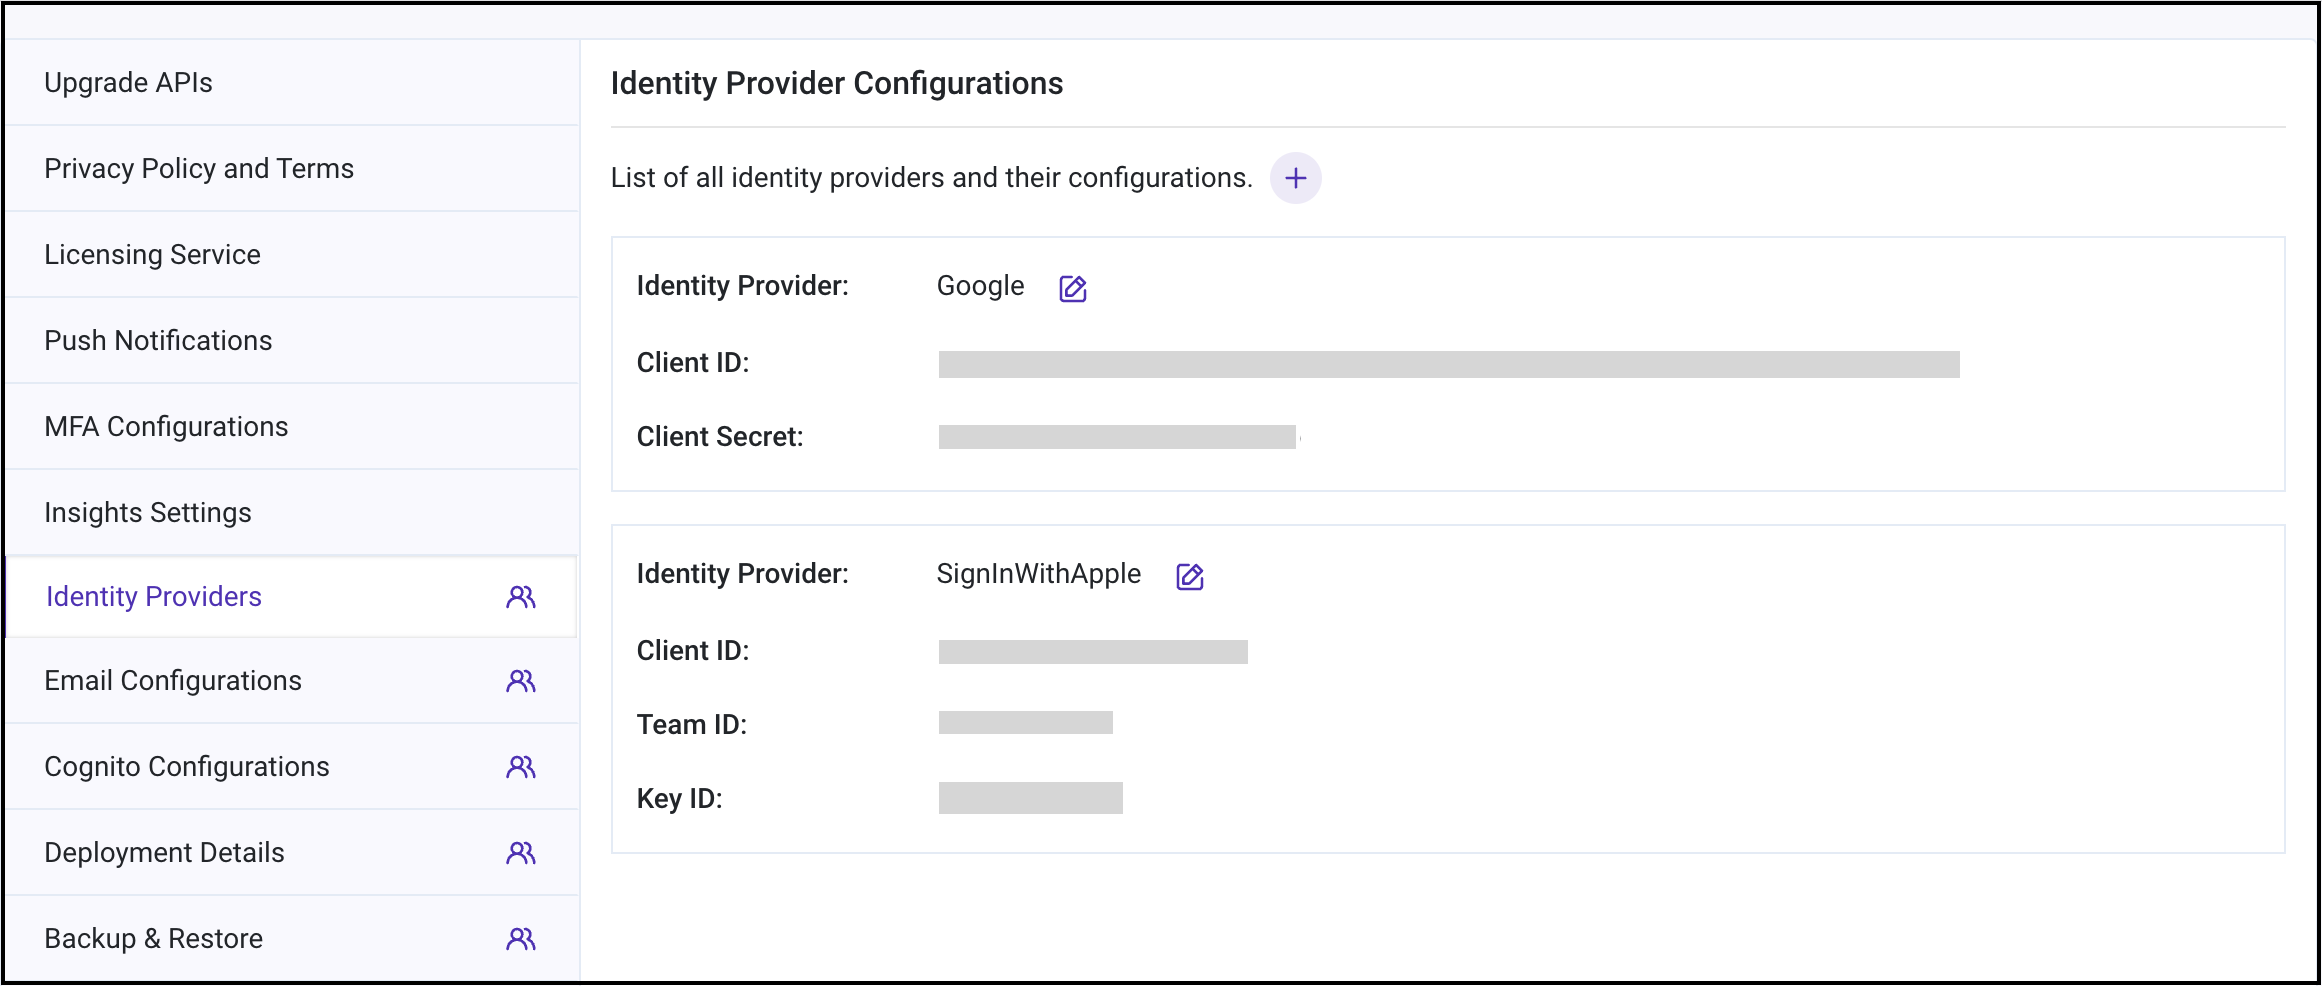
- Note down the Identity Providers
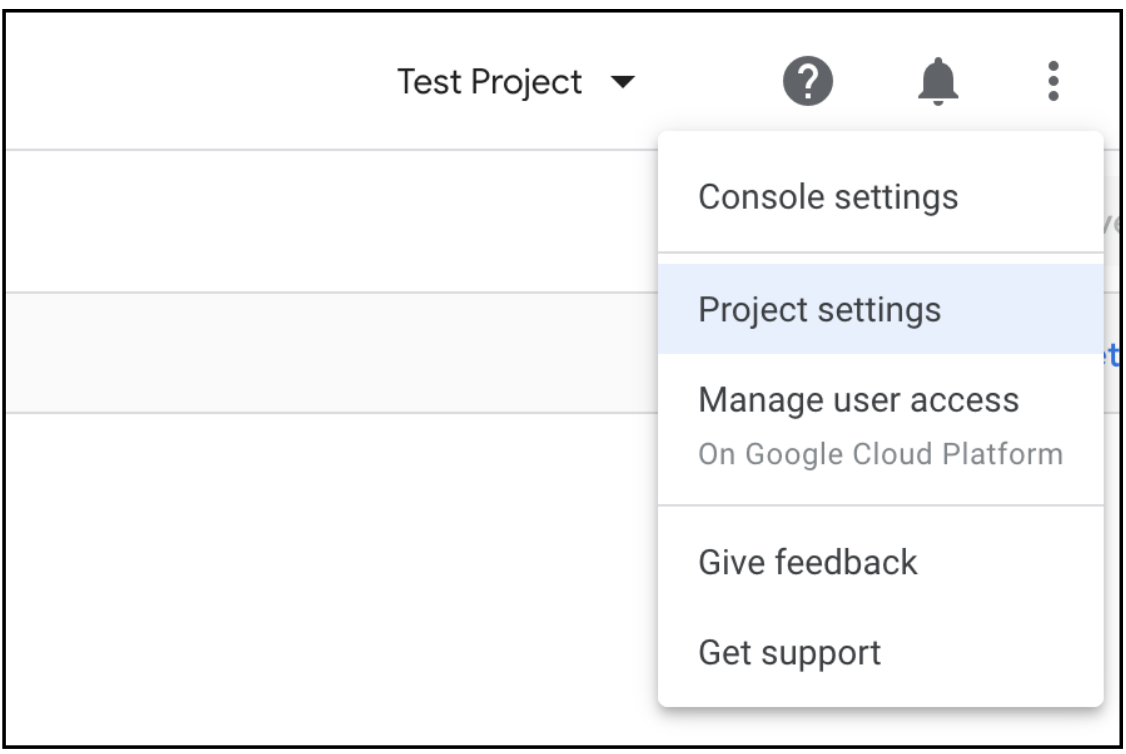
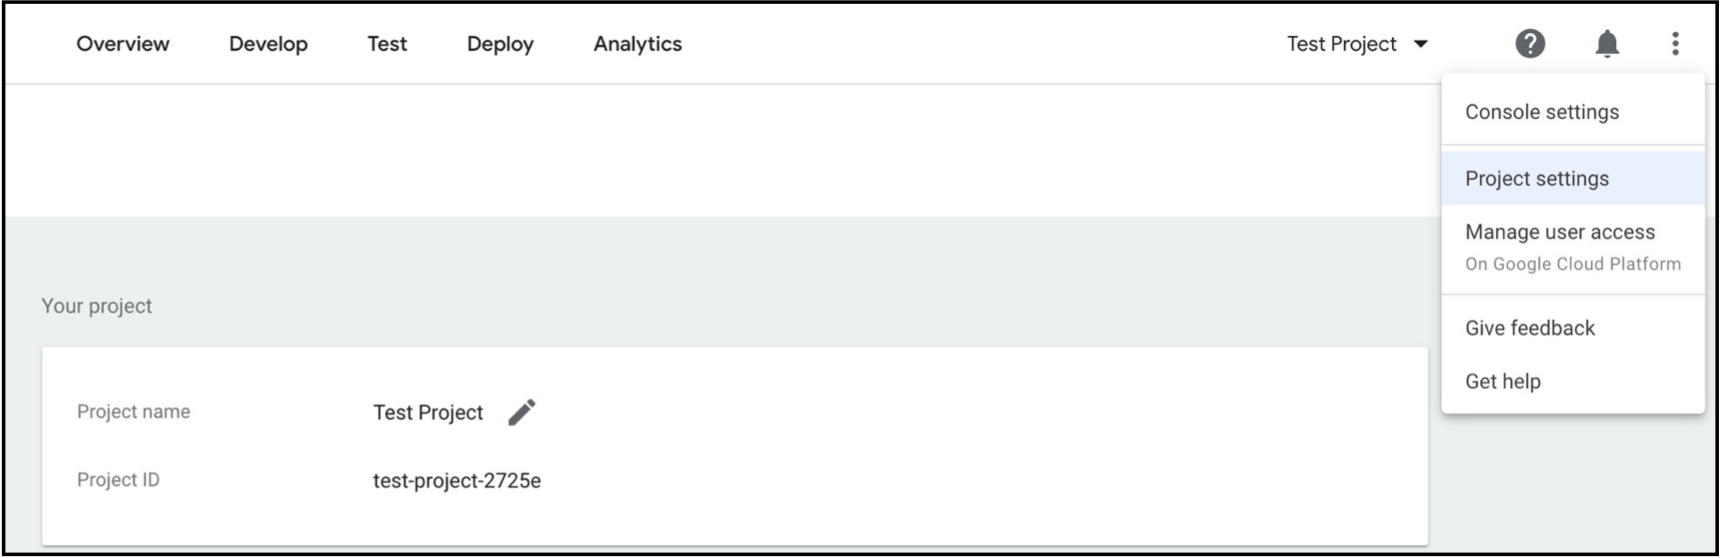
- To obtain the list of the configured Identity providers in the RainMaker deployment, go to the RainMaker Dashboard and click on the Deployment Settings tab in the left nav-bar.
- Then click on the Identity providers tab.
- Note down the Identity Providers.
- If Google, GitHub, and SignInWithApple are configured, then the corresponding values in the SkillIdentityProviders while deploying the ESP-RainMaker-3p-CognitoClients SAR Application will be Google, GitHub, SignInWithApple, COGNITO.
Note: If no identity provider is configured, then the default value will be set to only COGNITO.
Note down AlexaCognitoCallbackURLs and SkillId as described in the Alexa skill creation step.
Note down GVACallbackURLs as described in the Google Action creation step.
Deploying the SAR Application ESP-RainMaker-3p-CognitoClients
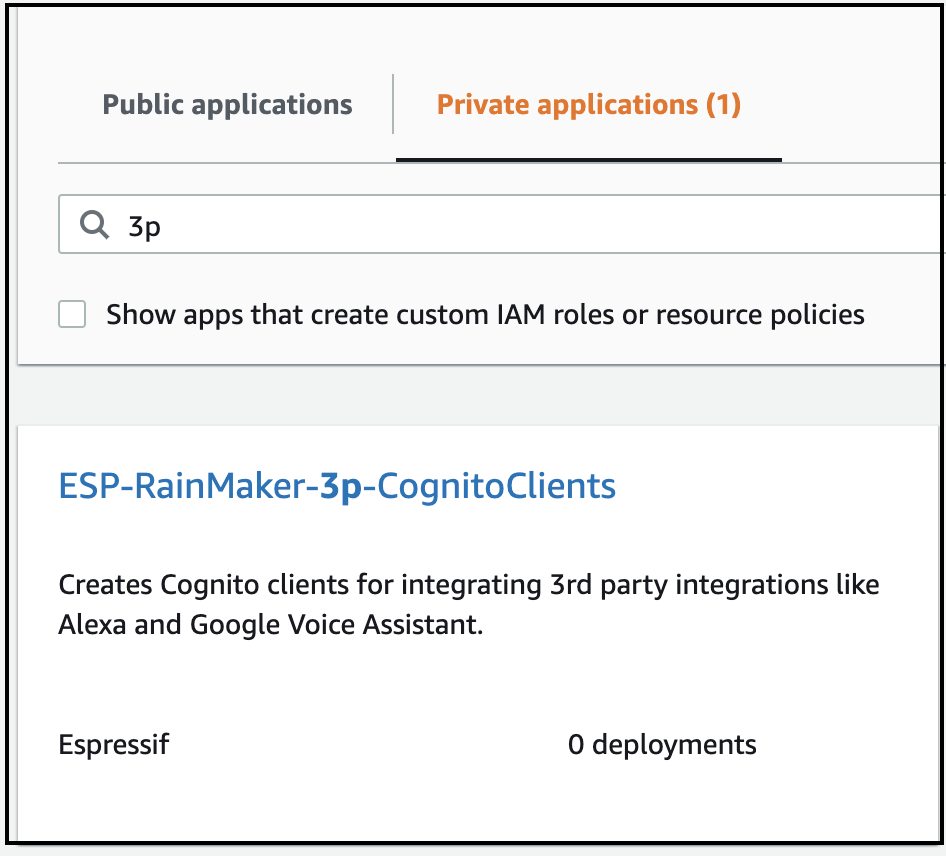
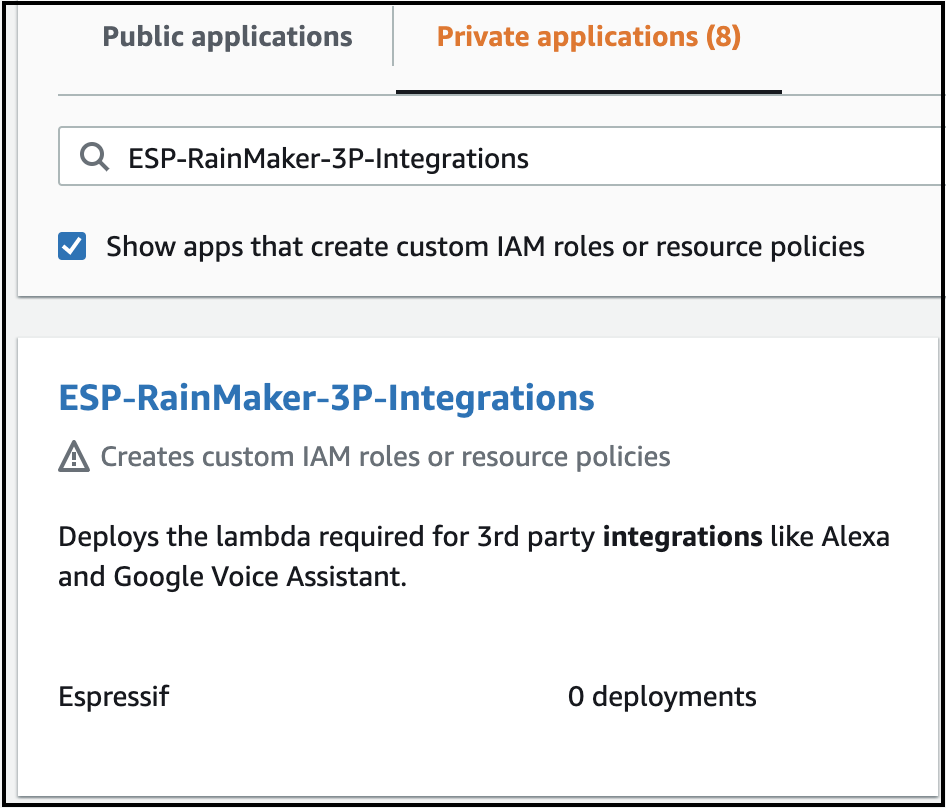
- Go to the AWS dashboard and search for Serverless Application Repository or SAR.
- Go to Private applications and click on the check-box - Show apps that create custom IAM roles or resource policies
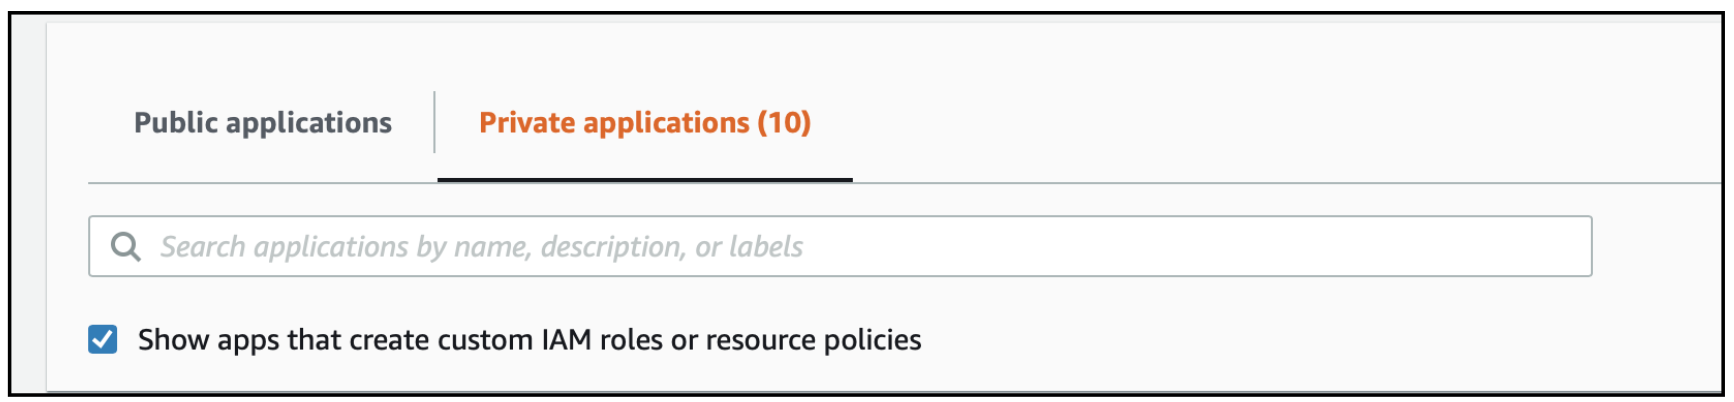
- Search for ESP-RainMaker-3p-CognitoClients.
- Enter the below values and click on deploy.
AlexaCognitoCallBackUrls - The value for this parameter can be found in the section - Create an Alexa Smart Home Skill
GVACognitoCallBackUrls - The value for this parameter can be found in the section - Create a Google Smart Home Action
SkillIdentityProvidersNewUserPool - Enter the identity providers to be configured noted down in the section, Creating the AWS Cognito App Clients for Alexa and Google Voice Assistant.
SkillIdentityProviders - Keep default values
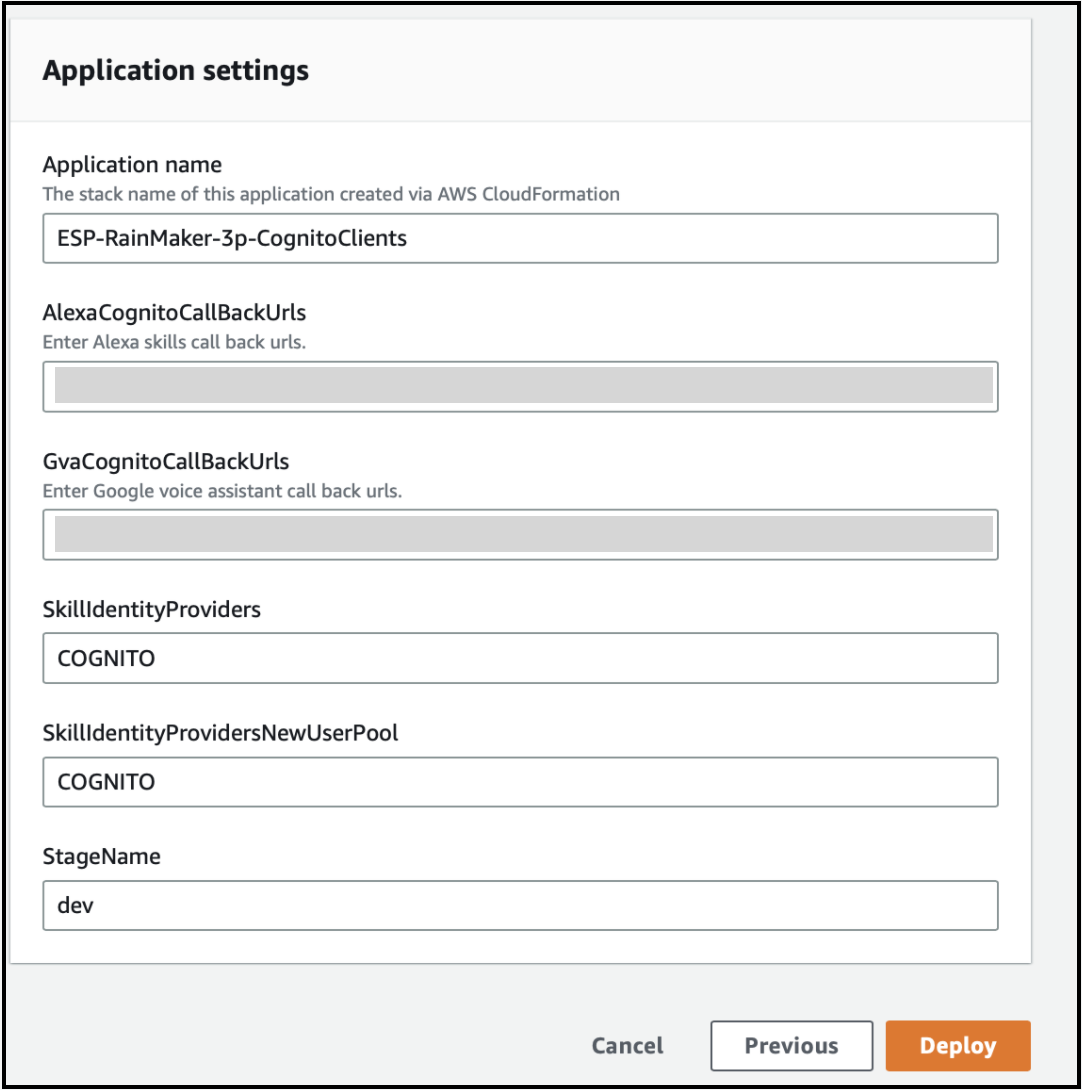
You can keep the other parameter values as it is, and click on Deploy.
- The below screen will be displayed on a successful deployment.
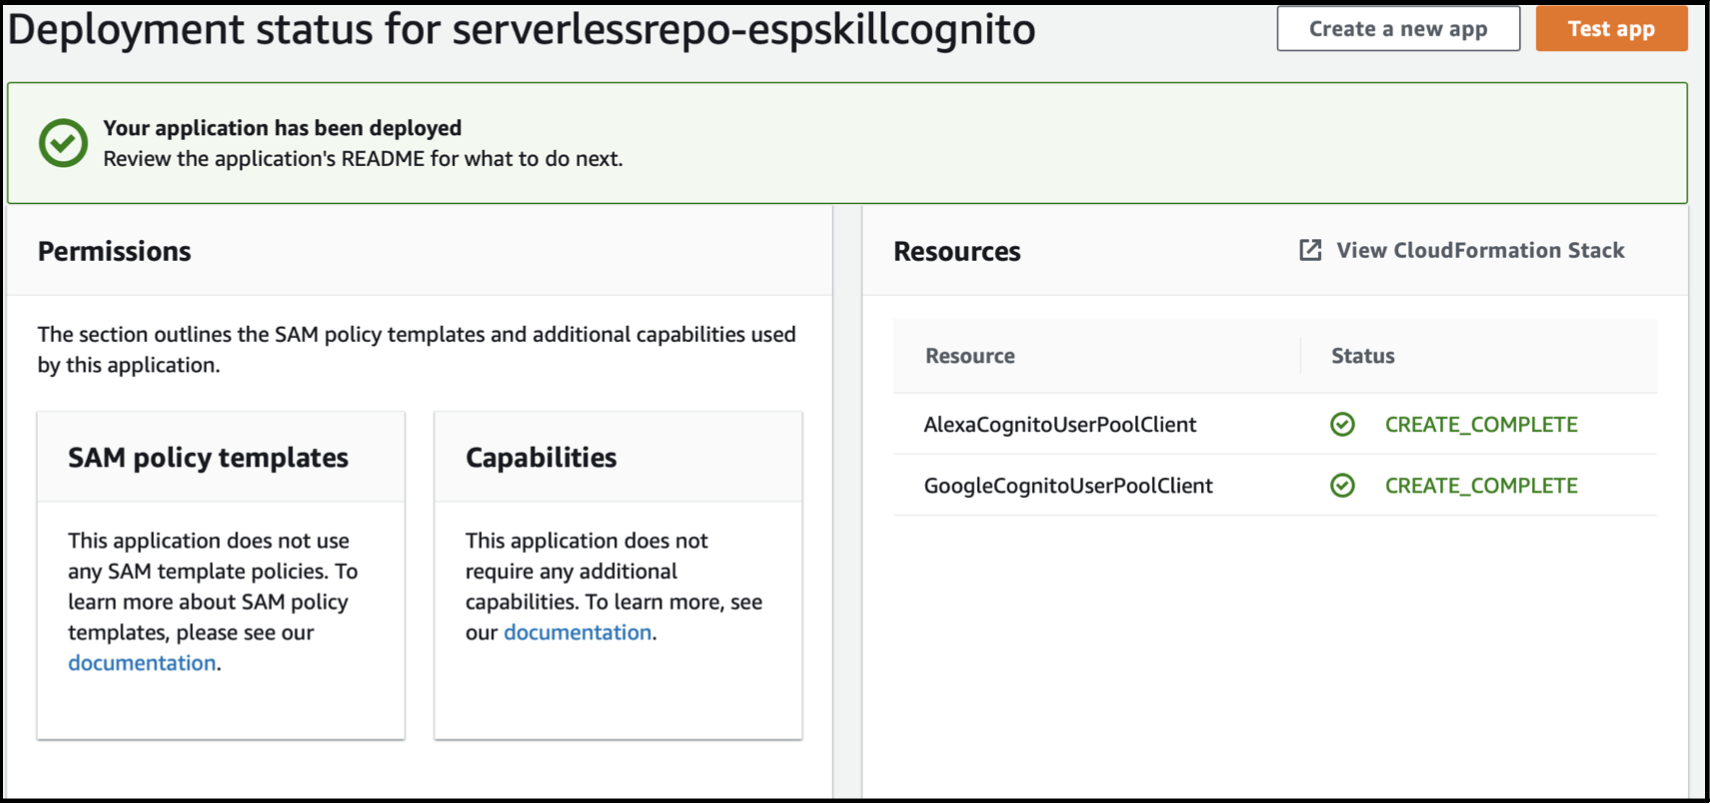
- The deployment will create AWS Cognito App Clients for the Alexa Skill and Google Actions.
Prerequisite for configuring Voice Assistant Integration
- Alexa GVA handlers call the RainMaker API endpoint URL for device information. Thus, the RainMaker API URL needs to be given as input to the ESP-RainMaker-3P-Integrations Application.
- Follow Get Base Url steps to fetch the RainmakerAPIUrl.
- Rainmaker Backend API Endpoint URL:
<RainmakerAPIUrl>/v1/. - Please note down this value, it will be used as the APIEndPointURL in the next step.
Enabling Google Asynchronous messaging and getting Google messaging client details
GVA requires the handler to report the state to the Homegraph service in the Google Cloud. Thus, it is required to create and add the credentials of a Google Service Account into the handler.
If you want to deploy Google Action integration, follow the below steps to get these credentials.
- Enable the Homegraph API in your account. Detailed steps are given below.
- Go to Google Homegraph page.
- On the drop-down menu at the top, select your smart home project created in previous steps.
- Click on Enable.
- Create a Service Account Key file.
- Go to Google Service Account page.
- Select your smart home project created in the previous step.
- Click on the "Create Service Account" option.
- In the Service account Name field, enter a suitable name.
- In the description, enter "Service Account for report state token creation"
- Click on Create and Continue.
- In the next step, select the role type "Service Accounts" and select the role "Service Account token creator".
- Click Continue and then click on Done.
- Service Account is created, now you need to add the key to use the service account.
- Click on the created service account email.
- Go to the Keys option and click on Add Key.
- Select the "Create Key" option.
- Select the JSON key type.
- A file will be downloaded with the required credentials details.
- Open the downloaded service account file. The file will have the required credentials.
- Note down the values for GVAClientID (client_id), GVAClientEmail (client_email), GVAPrivateKey (private_key), GVAPrivateKeyID (private_key_id) & GVAProjectID (project_id) in the key file.
Enabling Alexa asynchronous messaging and getting Alexa messaging client details
For Works with Alexa certification, the device state is reported to Alexa. Thus, it is required to enable Asynchronous messaging.
If you want to deploy Alexa skills integration, enable Alexa Asynchronous messages and copy the AlexaClientId and AlexaClientSecret. The detailed steps are as below:
Login to Alexa Developer Console.
Select the smart home skill that you created in the previous steps.
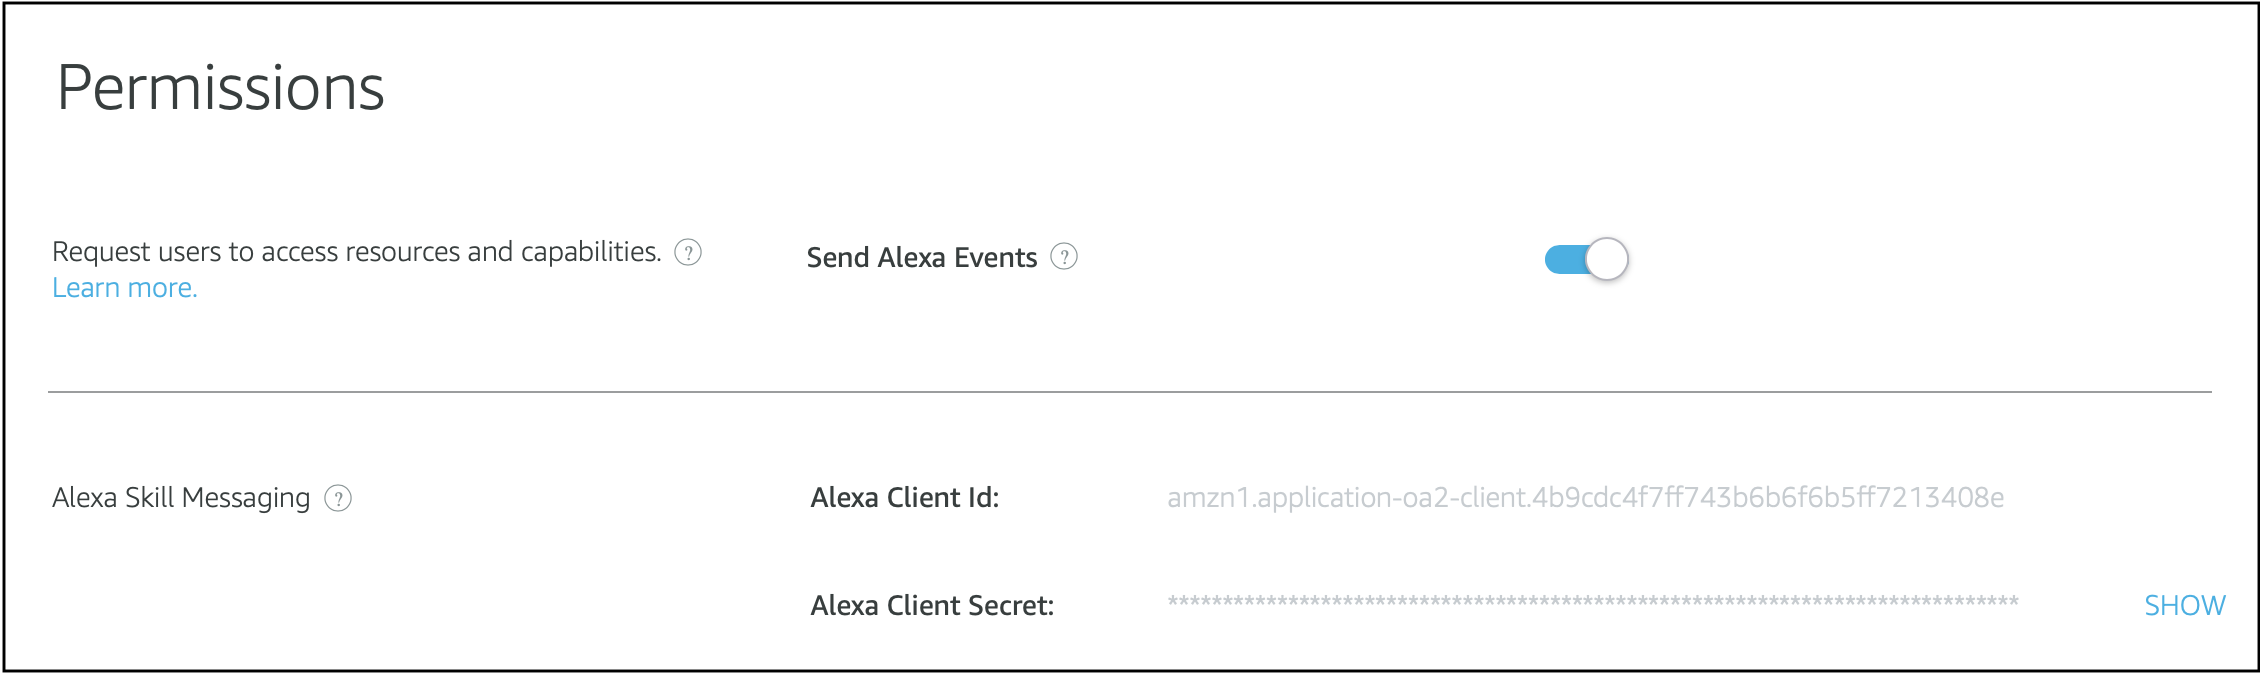
Go to the "permissions" tab from the left nav bar, and enable the "Send Alexa Events" option.

After you enable the "Send Alexa Events" option, a new section "Alexa Skill Messaging" will be visible.
Note down the values of Alexa Client Id and Alexa Client Secret.
Deploying the Alexa Smart Home Skill and Google Smart Home Action
- In this step, the lambda functions handling the directives from Alexa and Google Voice Assistant will be deployed.
Deploying the ESP-RainMaker-3P-Integrations stack
- Go to the AWS dashboard and search for Serverless Application Repository or SAR. Ensure that the us-east-1 AWS region is selected.
- Go to Private applications and click on the check-box - Show apps that create custom IAM roles or resource policies
- Search for
ESP-RainMaker-3P-Integrations.
- The below screen for the deployment of
ESP-RainMaker-3P-Integrationswill be displayed.
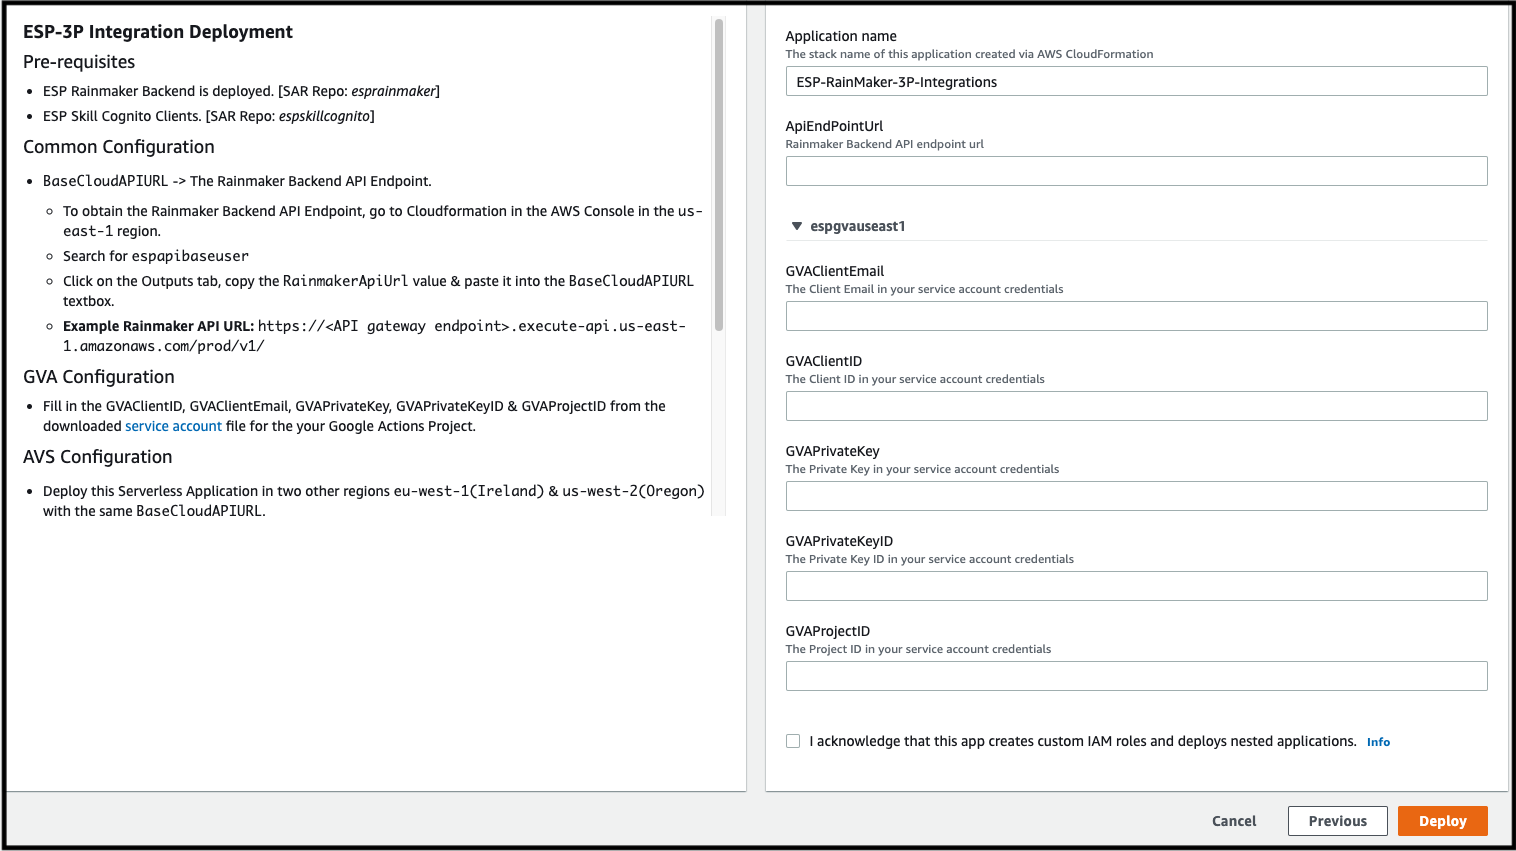
Enter the value for RainMaker Backend API Endpoint URL (APIEndPointURL) noted down in the previous section. Getting the value of API Endpoint URL. This URL will be used by both Alexa and GVA handlers for communicating with the Rainmaker backend.
Enter Manufacturer Name, Product Description, and Scene Description for your product. Manufacturer Name will be visible for all the scenes and products connected via your application. Product and Scene descriptions should describe all your devices and scenes to users.
Enter the Alexa client ID and client secret noted down in the previous sections. This will be used to get the Alexa refresh token for users. The refresh tokens are used while reporting the state to Alexa.
Enter the region where RainMaker is deployed(RainMakerRegion)
Enter your Alexa skill ID noted down in previous sections.
Enter GVA report state credentials fields(GVAClientEmail, GVAClientId, GVAPrivateKey, GVAPrivateKeyID, GVAProjectID) as copied from the service account key file in the last step.
Click the checkbox and click on Deploy.
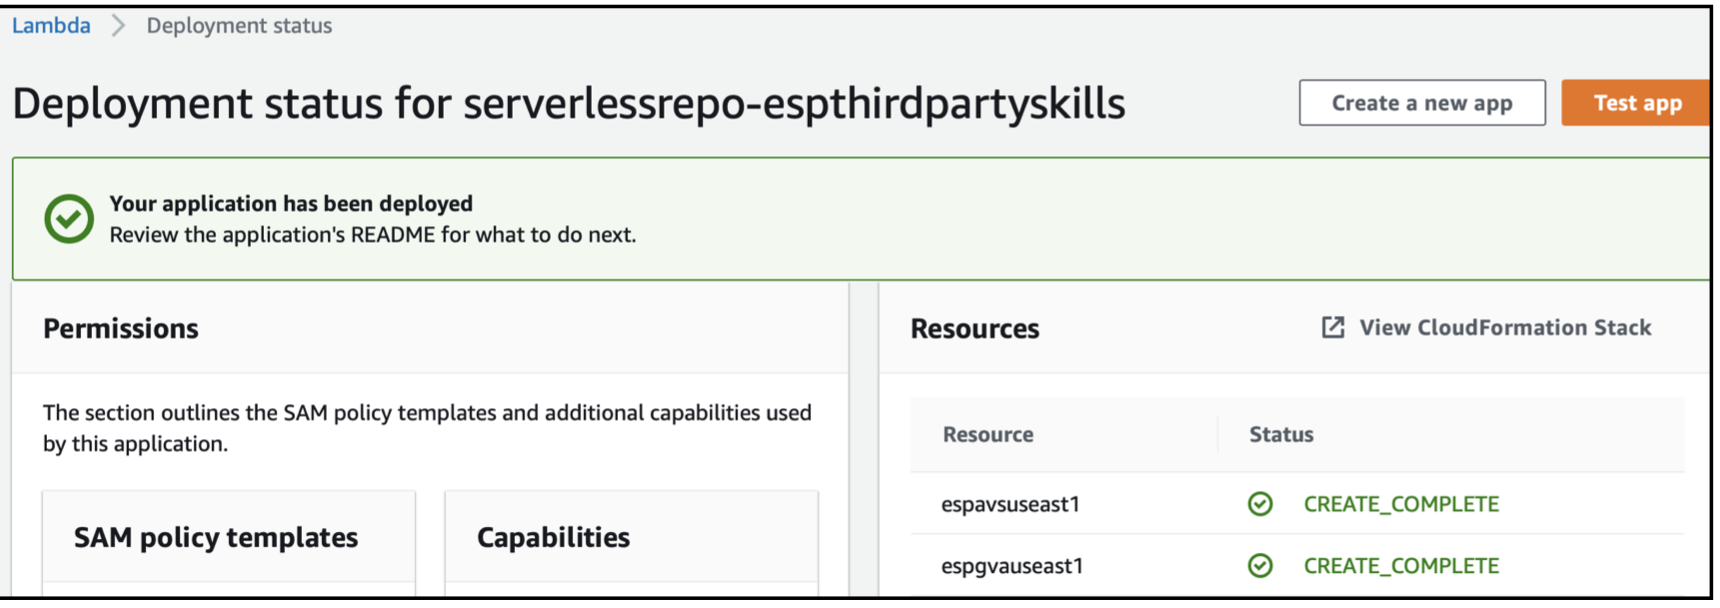
- Deployment will take up to 5-10 minutes to complete.
Alexa requires a multi-region deployment to support invocations from all geographies.
As Alexa requires multi-region deployment, the stack
ESP-RainMaker-3P-Integrationsneeds to be deployed in 2 additional regions. Change the region from the AWS dashboard and repeat the "ESP-RainMaker-3P-Integrations" deployment. Only Alexa-related parameters are required for the deployment ofESP-RainMaker-3P-IntegrationsSAR in other regions. The values for these parameters will be the same as used in the us-east-1 region. Deploy theESP-RainMaker-3P-IntegrationsSAR repository in below two additional regions.US West 2 (Oregon)
EU West 1 (Ireland)
The Google Action does not require a multi-region deployment, thus, it is deployed only in
us-east-1. TheESP-RainMaker-3P-Integrationsapplication in us-east-1 ensures that the Google Action is deployed with its deployment in the AWSus-east-1region.
If you want to enable only Alexa integration, you can add a placeholder value for GVAClientEmail, GVAClientID, GVAPrivateKey, GVAPrivateKeyID, and GVAProjectID. For example, you can put "NA" or "To be decided" as the value. These values can be changed later when you want to integrate Google Voice Action. Similarly, if you want to enable only Google voice assistant integration, you can add placeholder values for AlexaClientID, AlexaClientSecret, AlexaSkillId, and RainmakerRegion fields.
Prerequisites for configuration on Alexa Skills and Google Actions console
Getting the API endpoint of the deployed Google Action handler
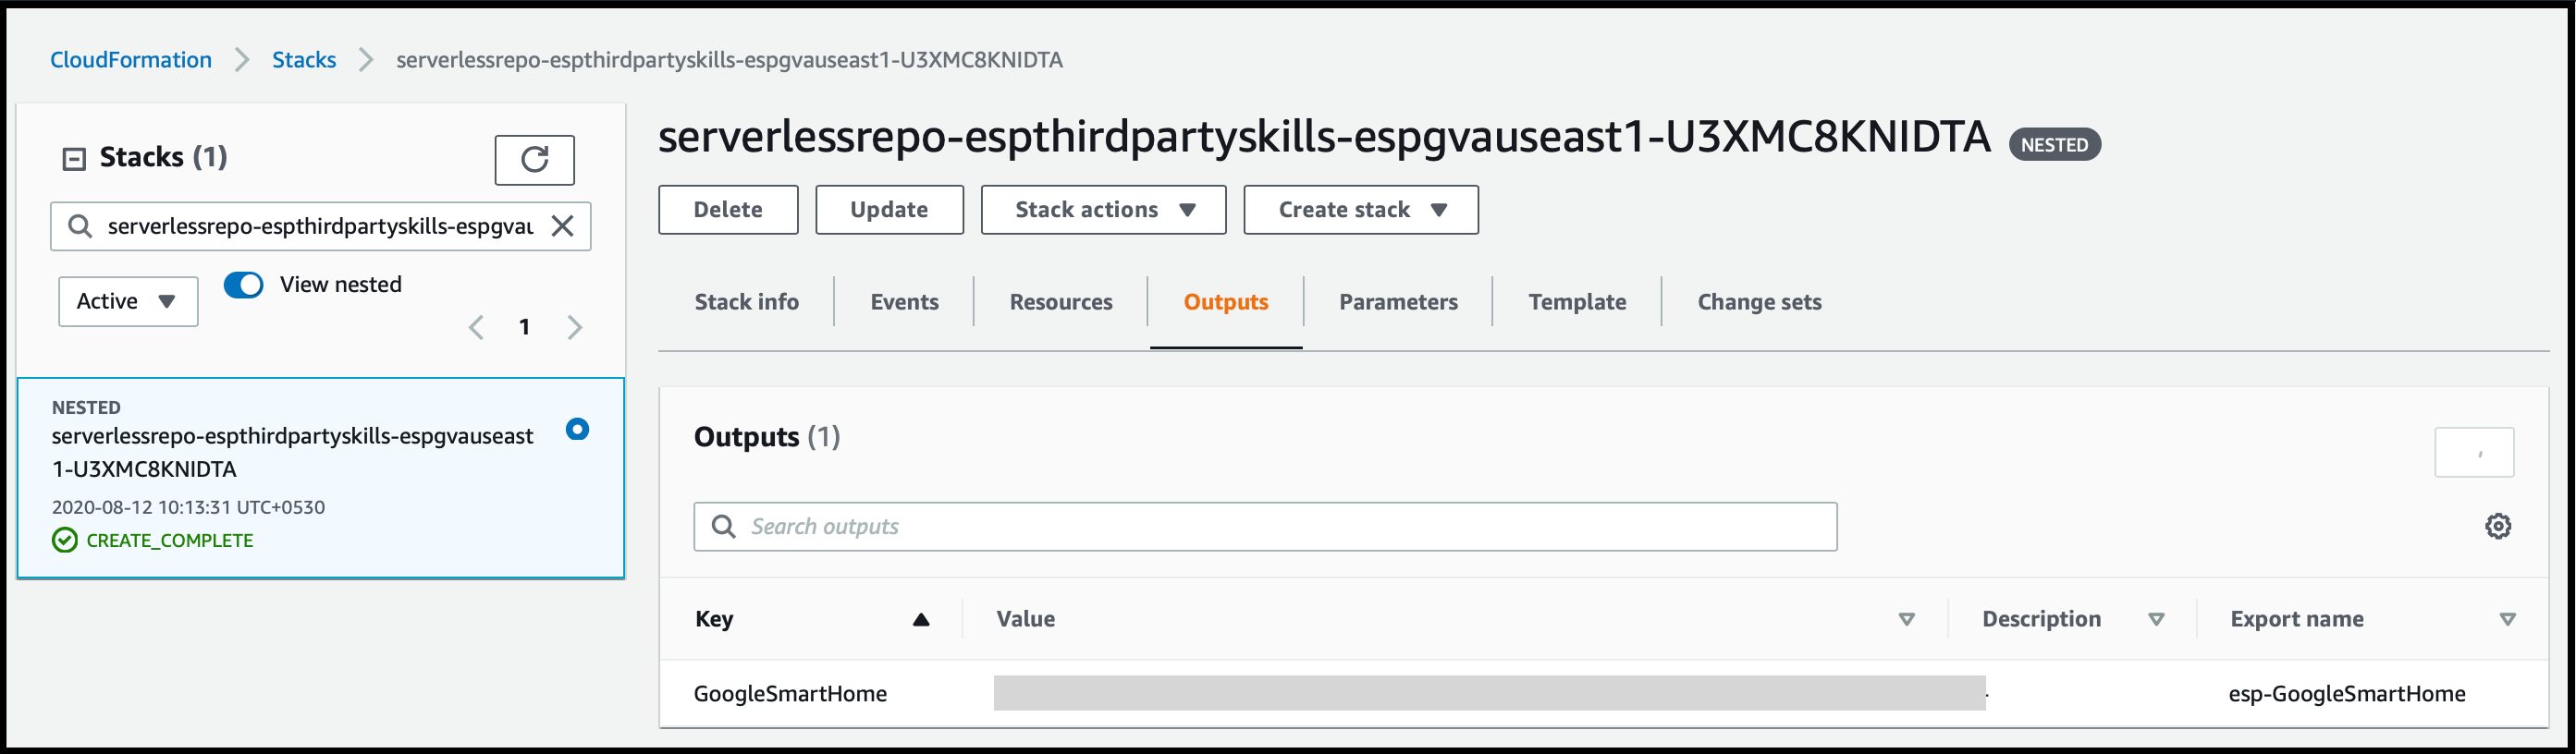
- From the AWS dashboard, go to CloudFormation and enable View Nested.
- Search for serverless repo - espgva
- Select the stack and go to the Output sections.
- Note down the value of GoogleSmartHome key. It will be added as the Fulfillment URL in the Google Actions Console.
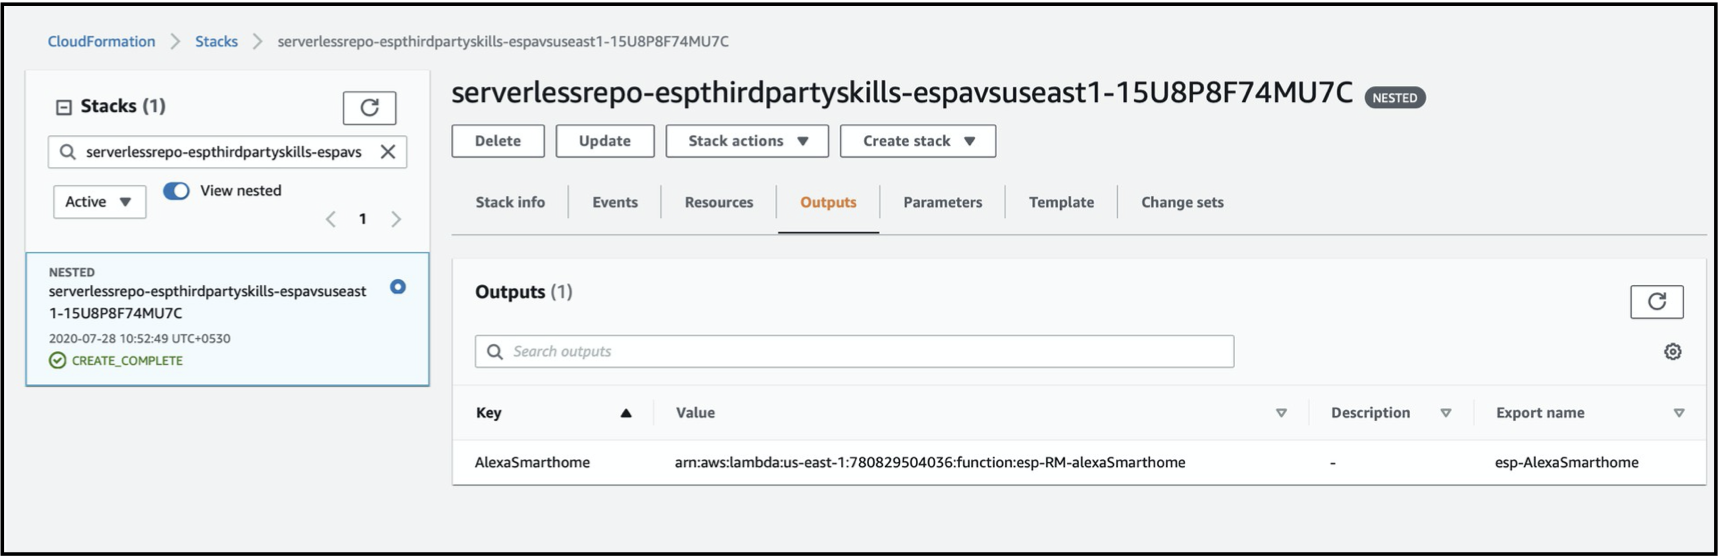
Getting the Lambda ARNs for the deployed Alexa Skill
- From the AWS dashboard, go to CloudFormation and enable View Nested.
- Search for serverless repo - espavs
- Select the stack and go to the Output sections.
- Note down the value of AlexaSmartHome key.
- Perform the above steps in US East 1(N. California), US West 2 ( Oregon ) & EU West 1 ( Ireland ).
- These values will be added as the Smart Home service endpoint in the Alexa skill created on the Alexa Developer Console.
Getting Domain URL
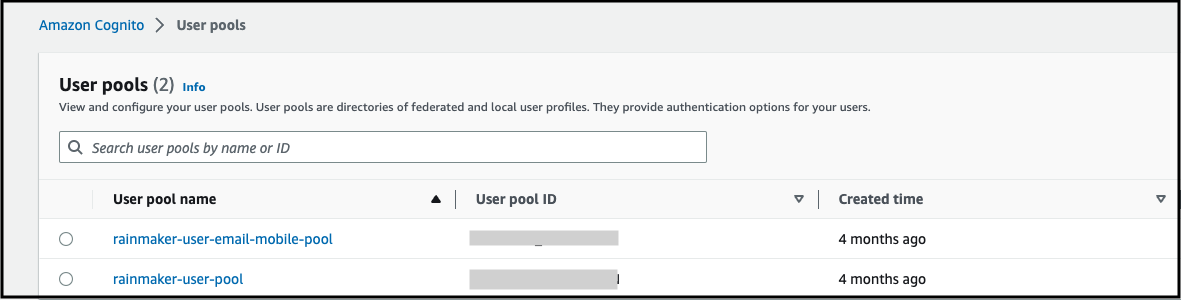
- From the AWS dashboard, go to the Cognito service page and click on "rainmaker-user-email-mobile-pool"
- In the App Integration section, click on Domain.
- Copy the complete URL for the domain.
- Note down the value as it will be required in further steps.
Getting the Client ID and Client Secret for Alexa Skill and Google Action
Standard RainMaker
- Search for Cognito in the AWS Search Bar.
- In user pools, click on the
rainmaker-user-email-mobile-pool.
- Within the
rainmaker-user-email-mobile-pool, click on App integration & scroll down to App client list

- Note down the app App Client ID and App Client Secret after clicking on
esp-rainmaker-alexa-skillandesp-rainmaker-google-action.
Oauth only RainMaker
Login: Login using the API
Call the Get Client API
Note down the client_id and client_secret for
esp-rainmaker-alexa-skillandesp-rainmaker-google-action.
Developer Console configurations
Once the above prerequisites are completed and all required values are noted down, you can go on to complete configurations on the Alexa and GVA developer console.
The steps for further configurations are here: