
RainMaker Add-on Services
ESP Timeseries
The Time-Series service is used for ingesting and retrieving the time series data for nodes, which are connected to the ESP RainMaker Cloud Platform. There are 2 components for this service:
Deploying the Base component
One of the components of this Time-Series service esp-rainmaker-base-timeseries needs to be deployed using CloudFormation. The details are provided below.
- Go to AWS Management Console
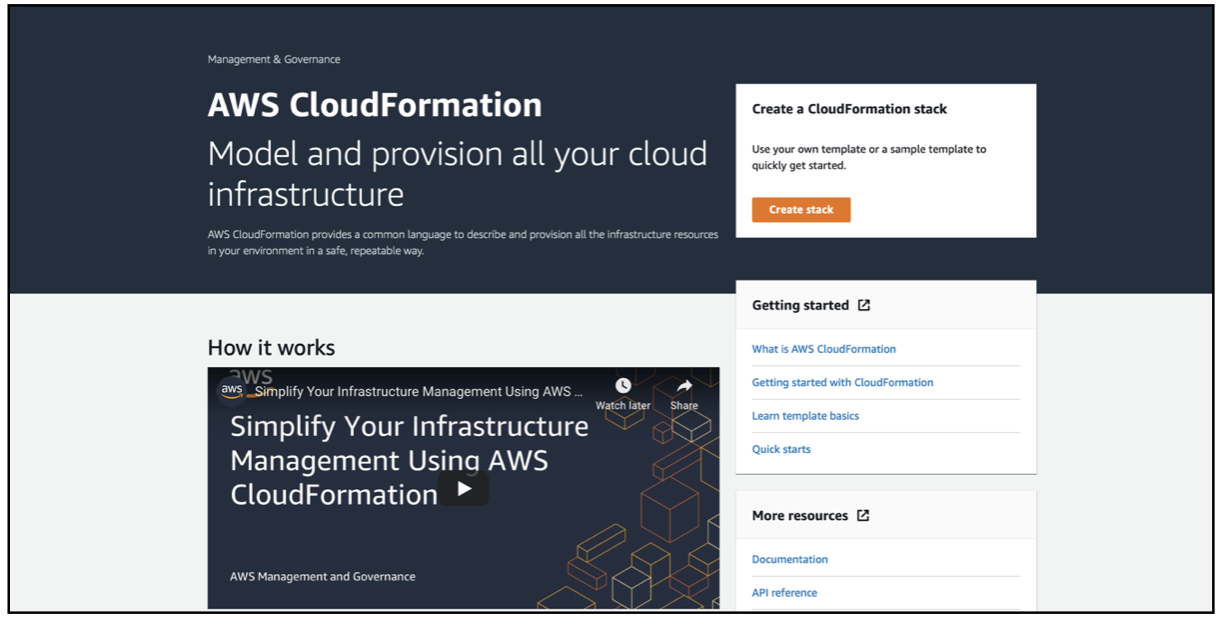
- In the Services, search for CloudFormation and click on CloudFormation, as shown below.

Currently this module can only be deployed in N. Virginia(us-east-1), Ohio(us-east-2), Oregon(us-west-2)), Frankfurt(eu-central-1), Ireland(eu-west-1). You may select one of the above regions for deployment and remember it, as it is required for the deployment of APIs. Our suggestion is us-east-1.
- Select create stack on CloudFormation service, as shown below.
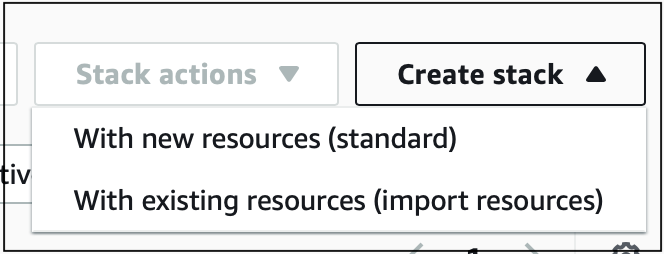
- If you click on "Create stack" option from stacks page, you will be prompted with two options to create stack as shown in the below image. Select "With new resources(standard)".
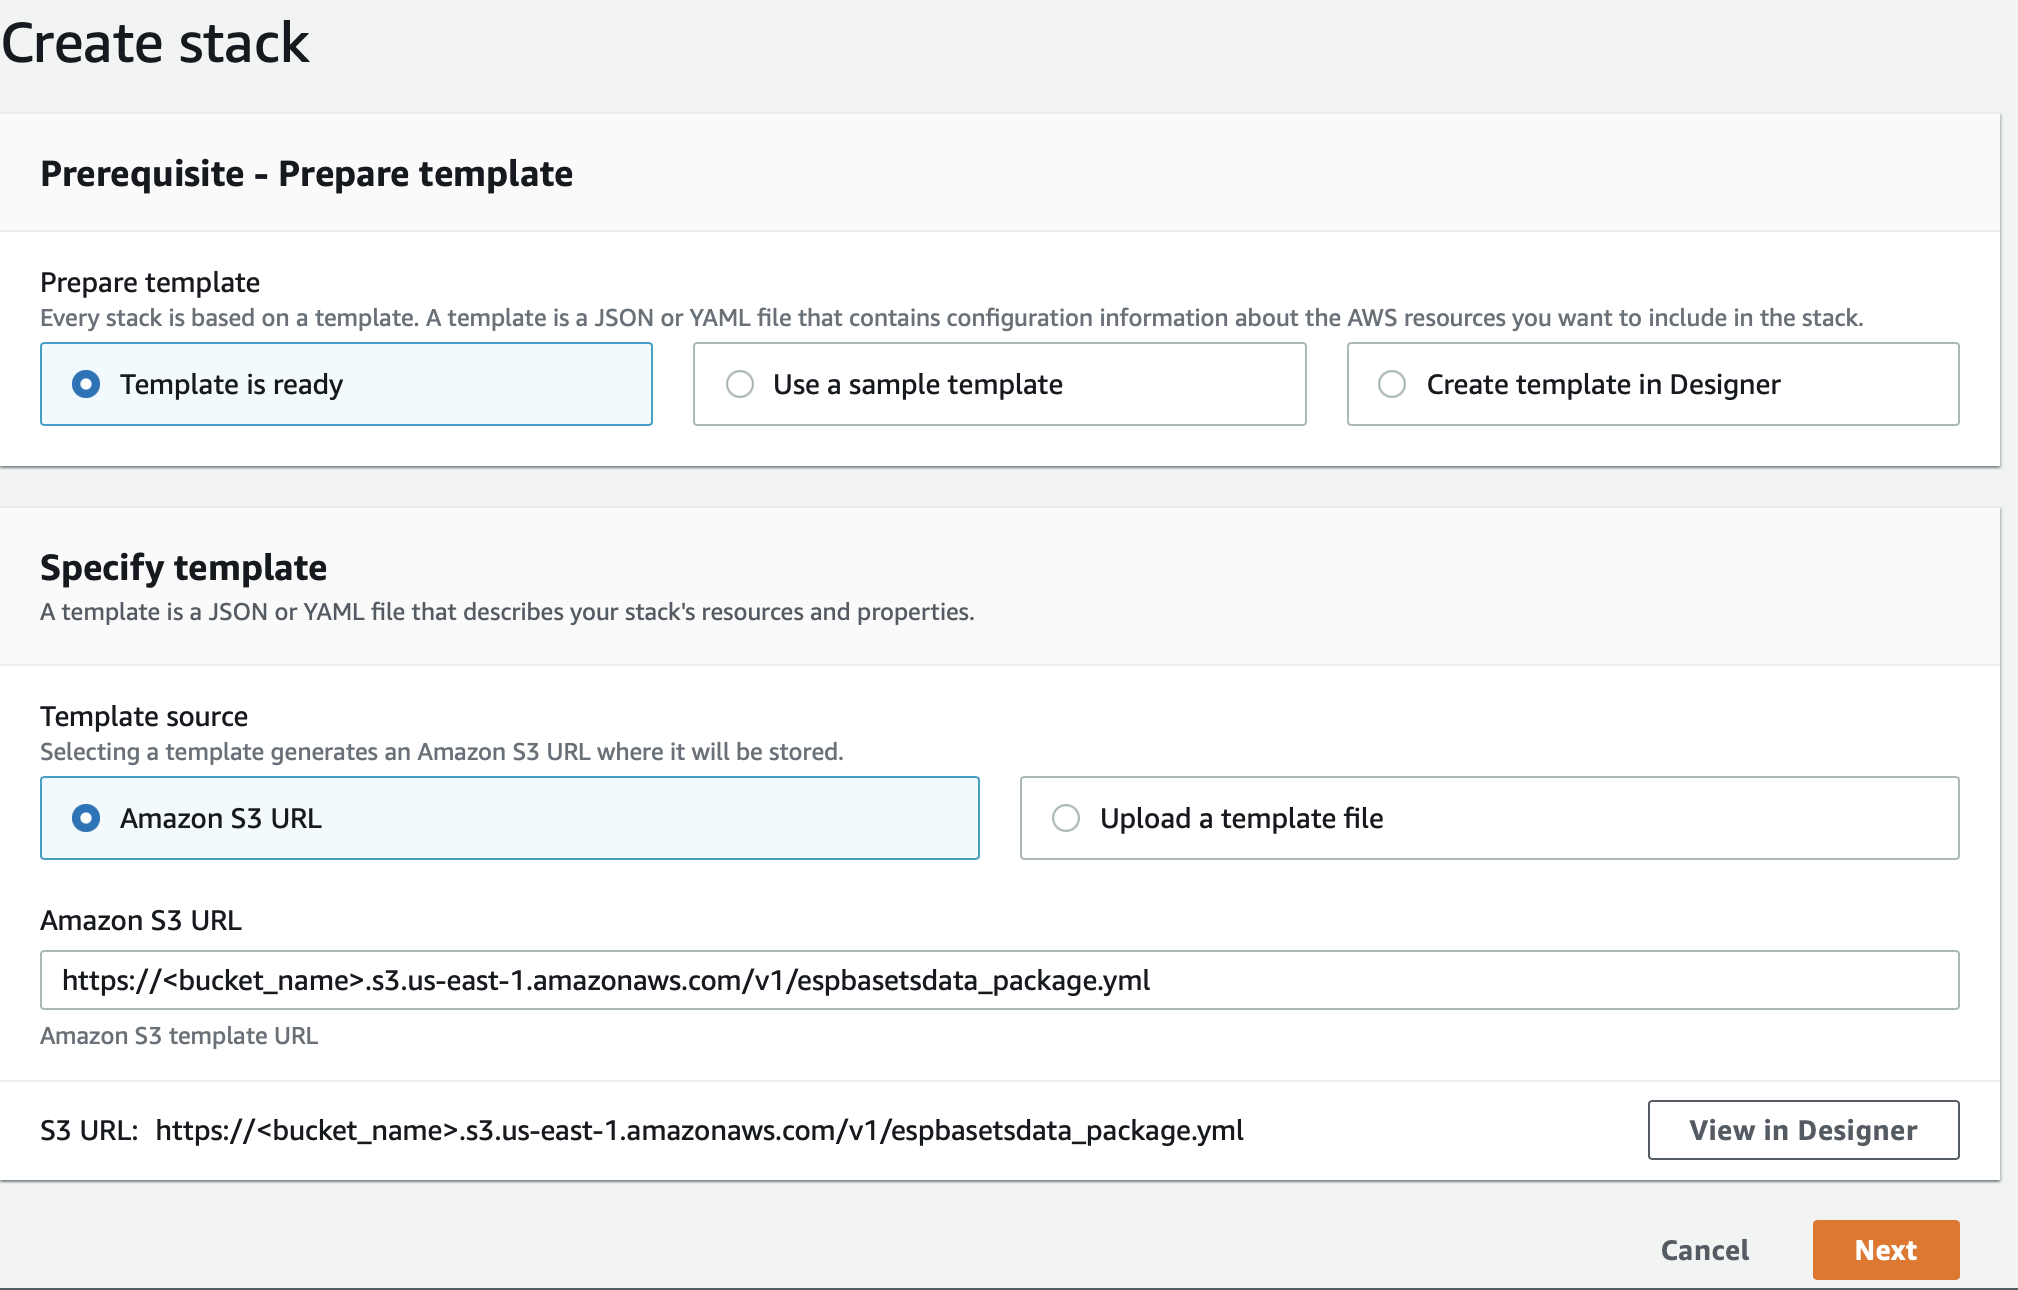
- Select the option "Template is Ready" and paste the below s3 URL in the field Amazon S3 URL, as shown below.
Amazon S3 URL: https://esp-rainmaker-timeseries.s3.amazonaws.com/v2/espbasetsdata-package.yml
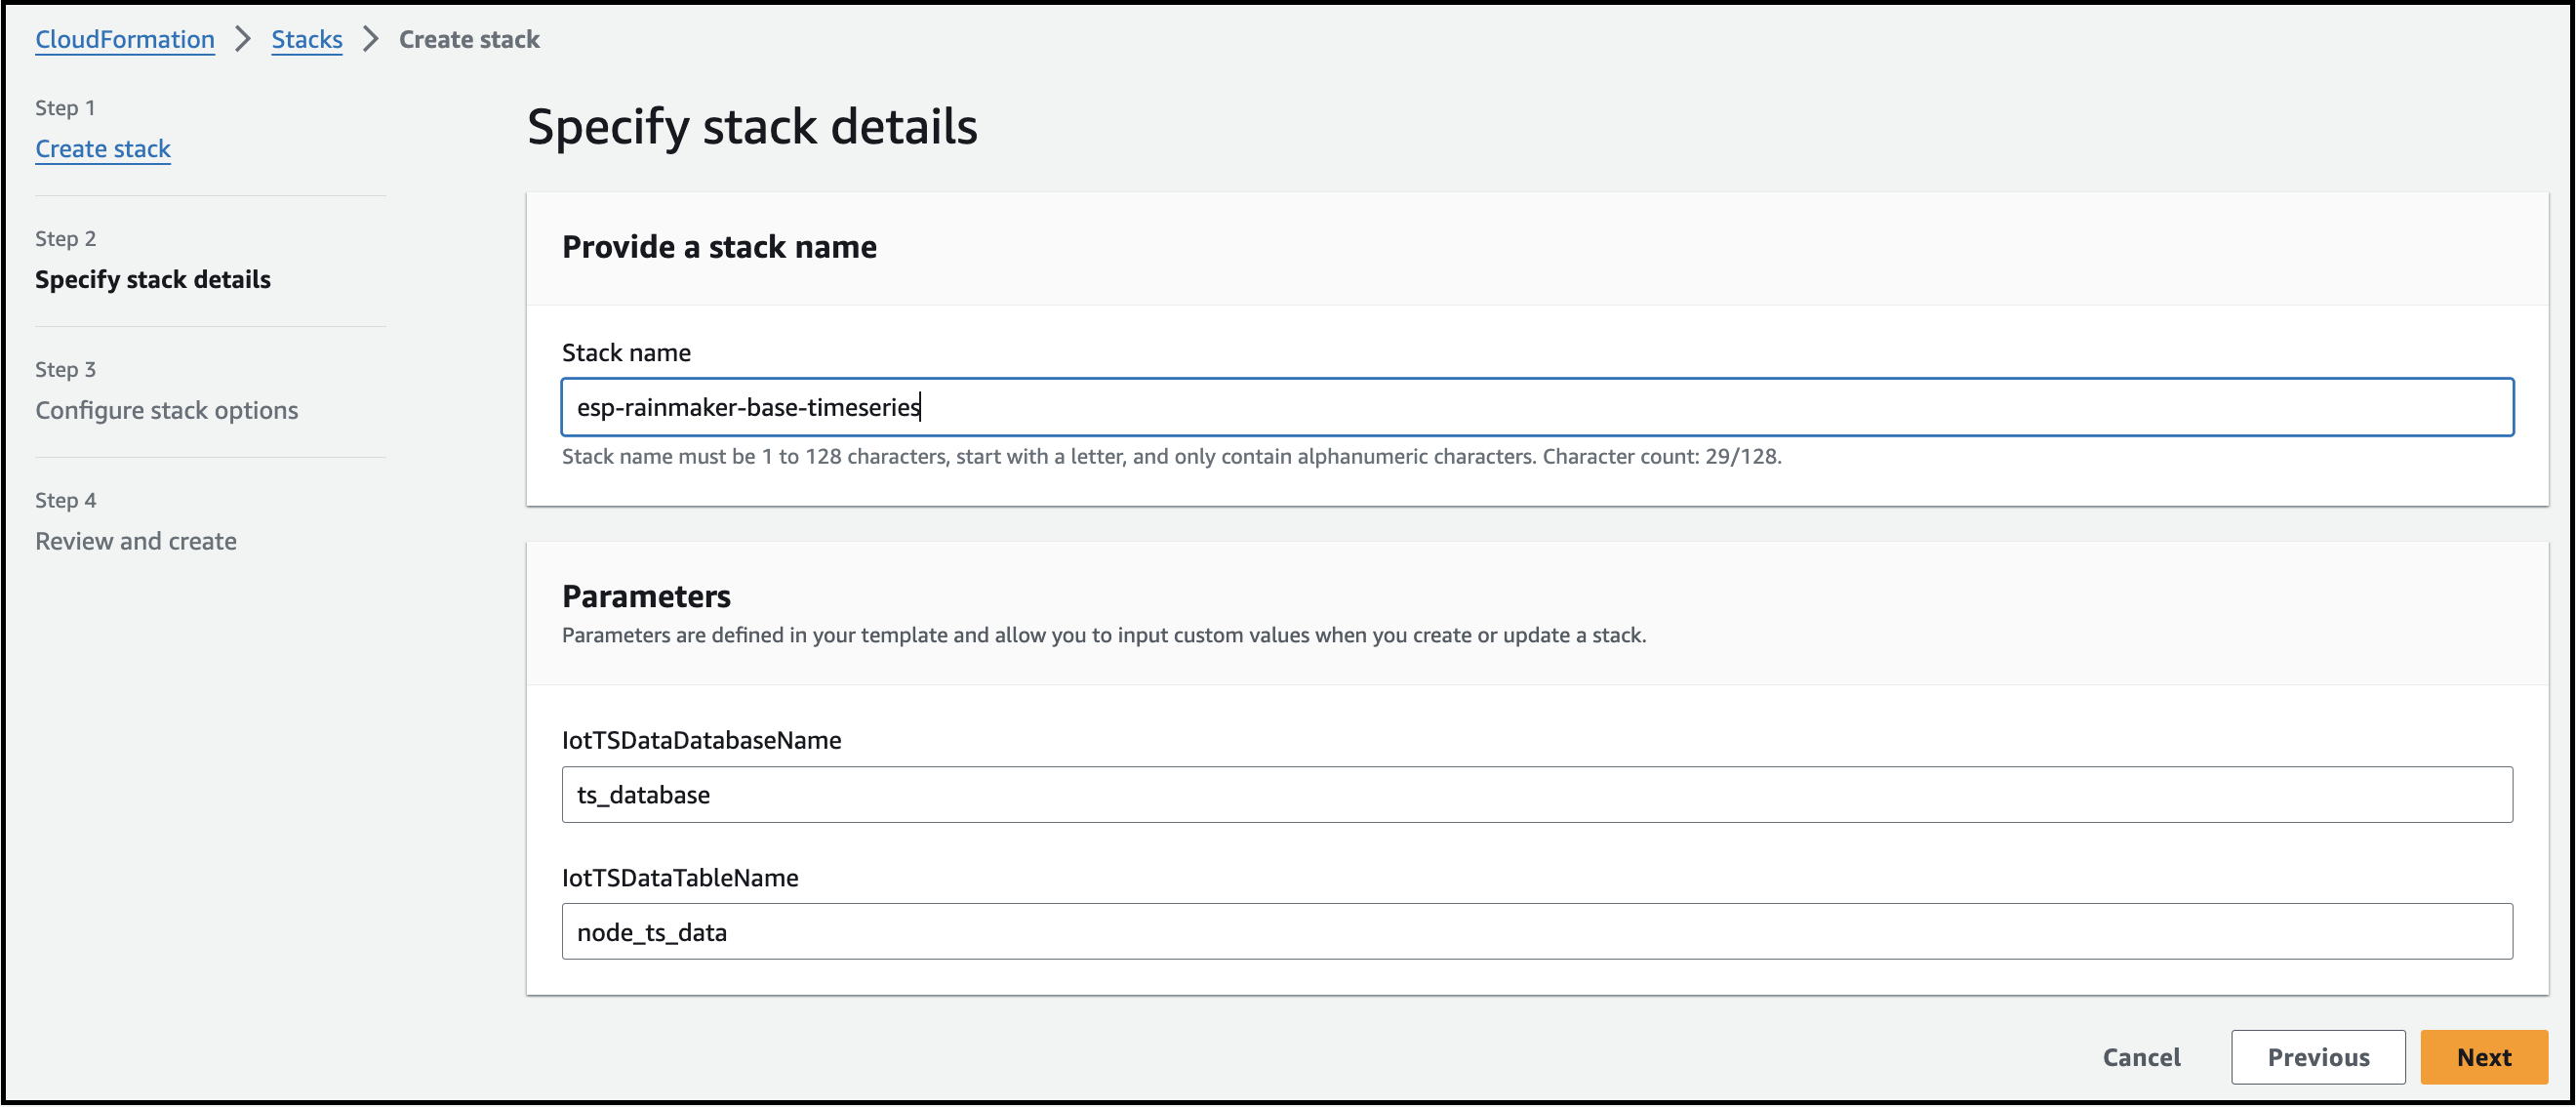
- Enter stack name as esp-rainmaker-base-timeseries, keep default configuration and select Next, as shown below.
- Select Next and add the version tag as shown below by entering the
- Key: Version
- Value: 1
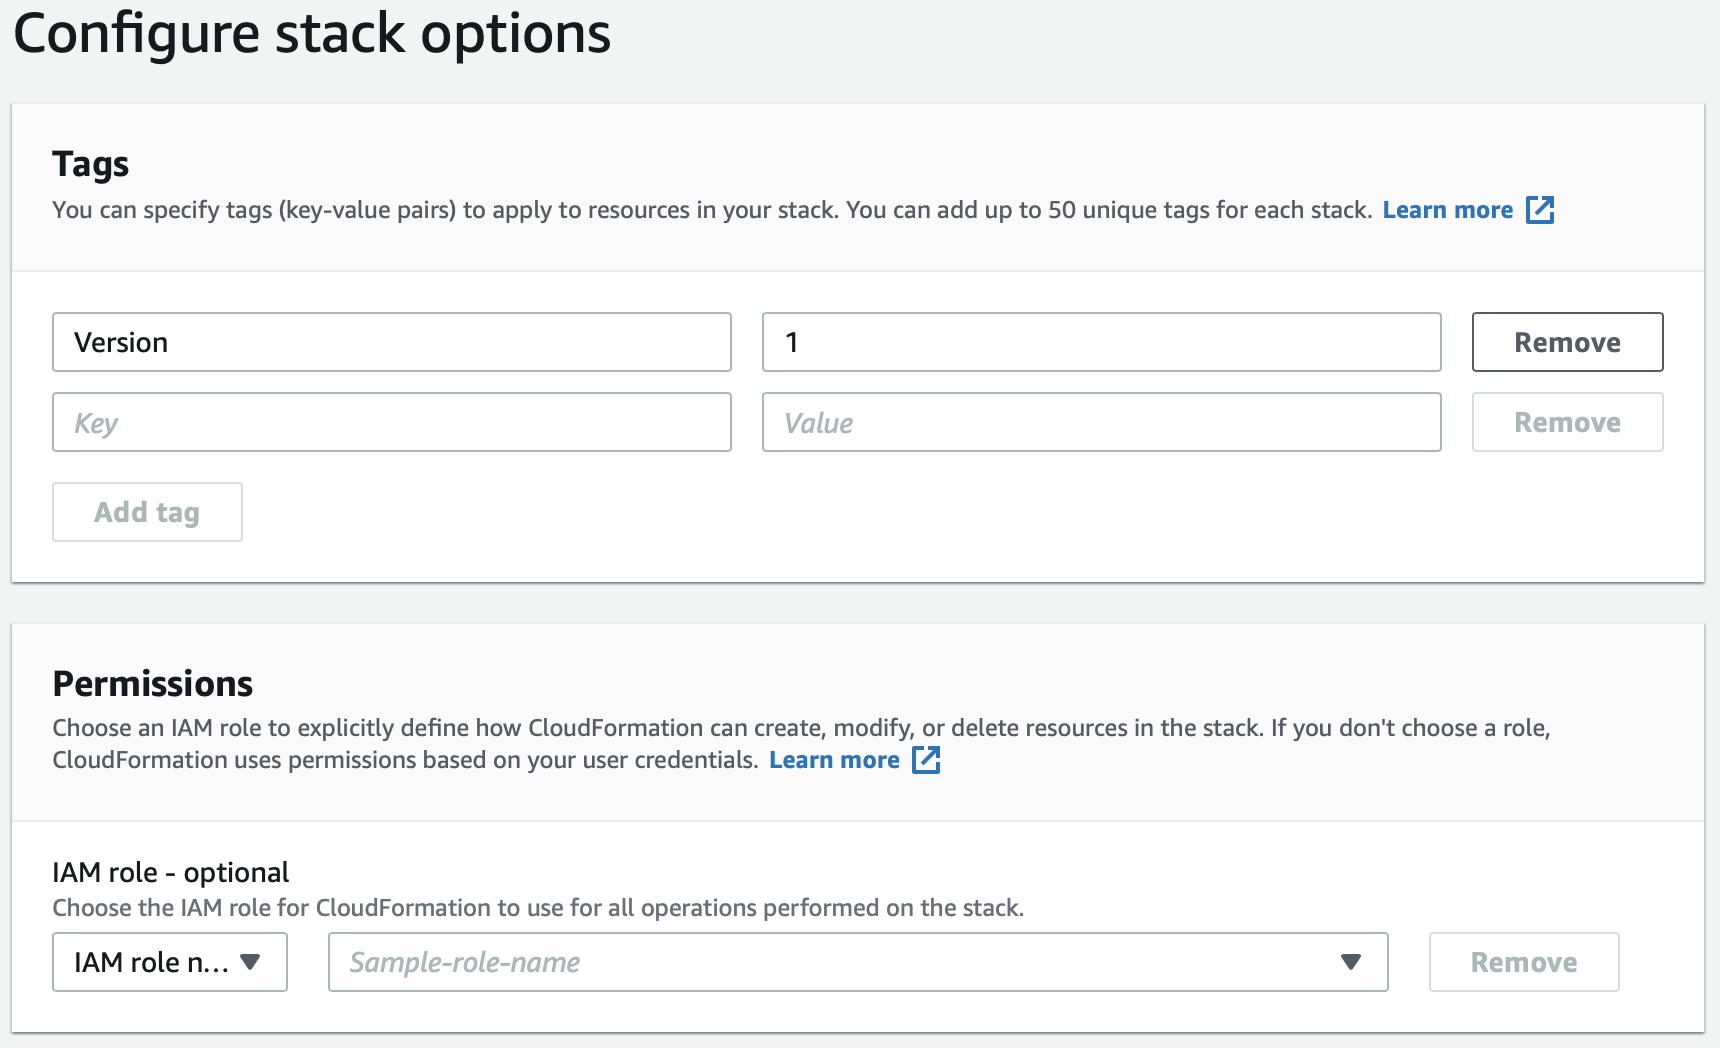
Click on the Add tag button to add it and leave the rest as default. Then click Next.
Select the below options:
I acknowledge that AWS CloudFormation might create IAM resources.
I acknowledge that AWS CloudFormation might create IAM resources with custom names.
I acknowledge that AWS CloudFormation might require the following capability: CAPABILITY_AUTO_EXPAND
And click on Create stack, as shown below.

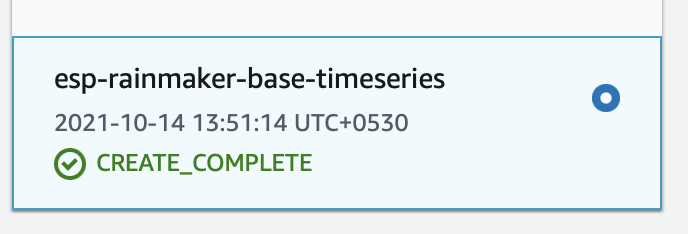
- Wait till the stack gets created, as shown below.
Deploying the APIs
Before proceeding please make sure that you have selected your Rainmaker deployment region for your account.
The SAR repository for the TimeSeries API component needs to be deployed after deploying the base component.
Steps for deploying the SAR repository -
- Login to AWS Management Console
- In the Services, search for SAR and click on SAR to navigate to SAR service, as shown below.

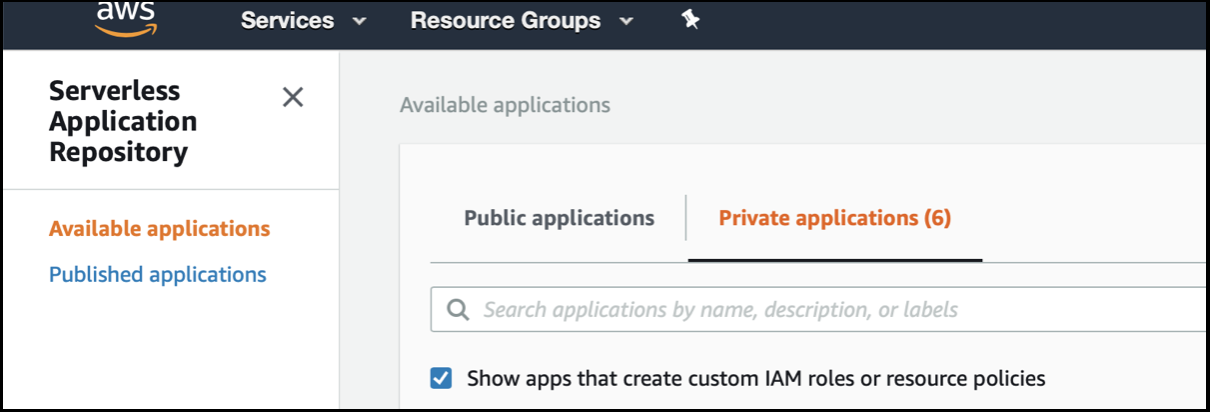
- Click on Available applications and select Private applications. Click the checkbox - Show apps that create custom IAM roles or resource policies.
- This is the repository that needs to be deployed.
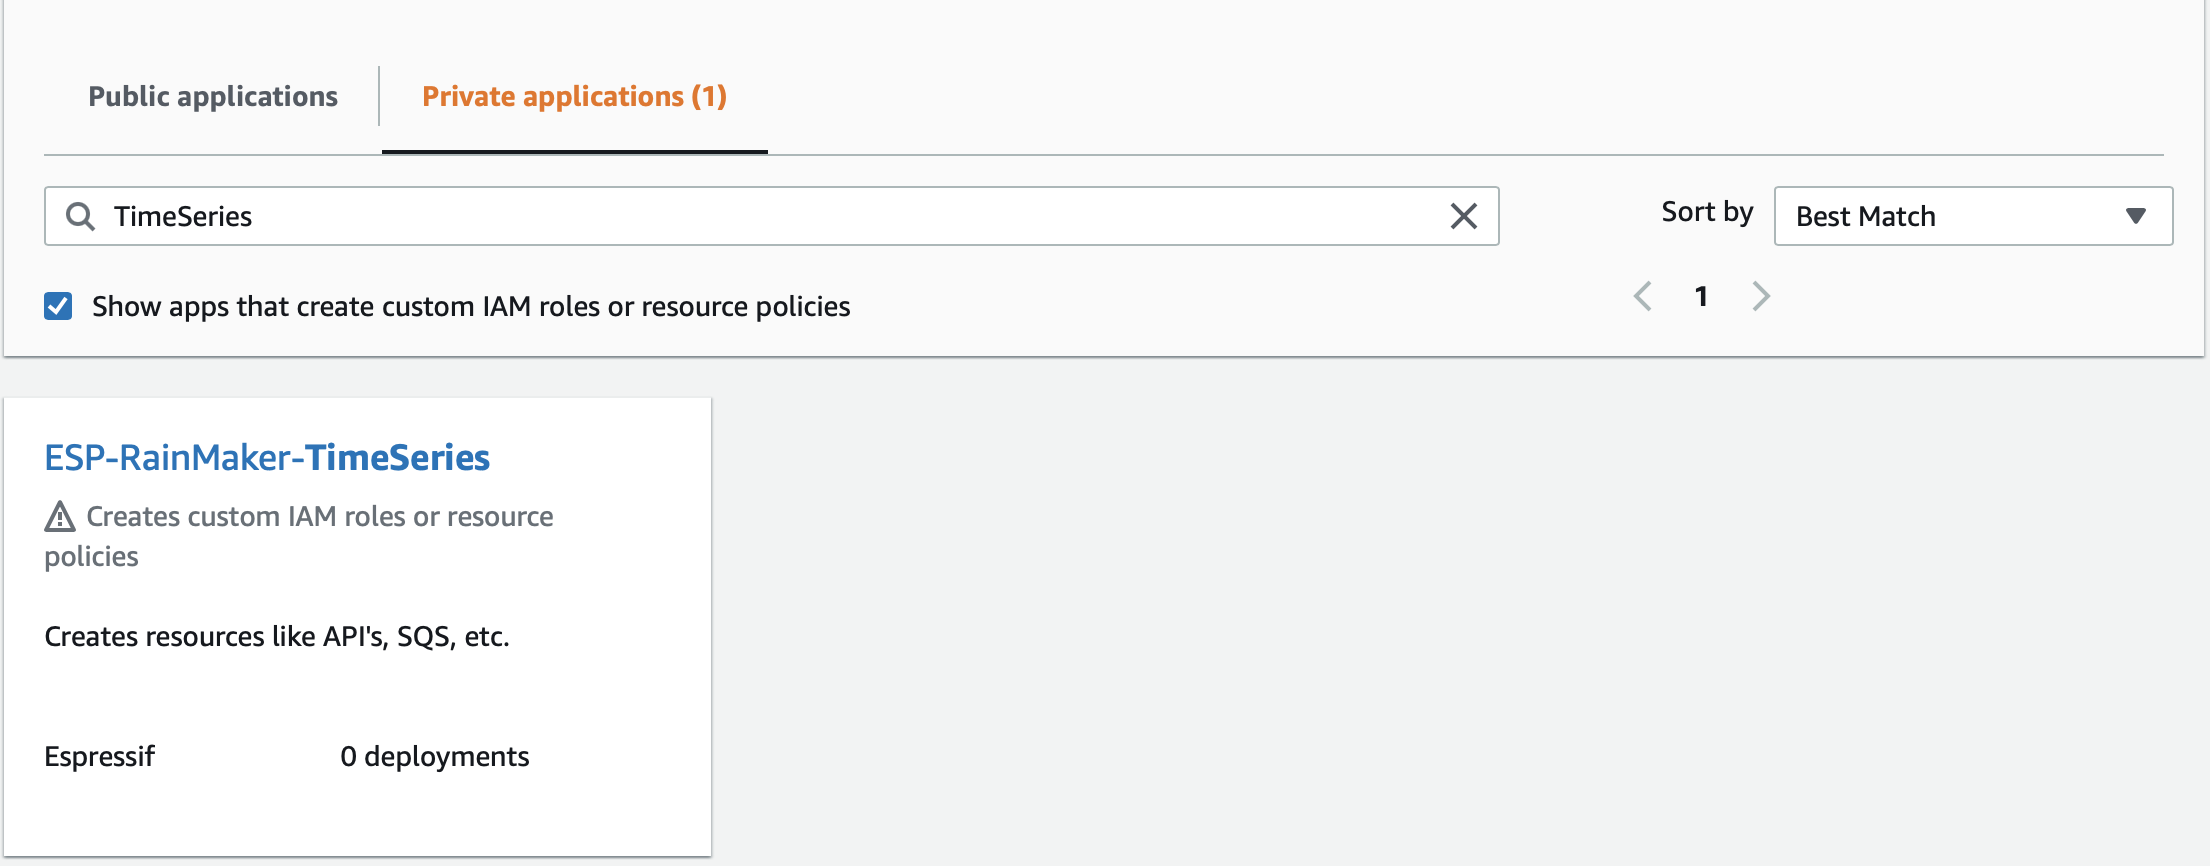
If you don’t see the RainMaker TimeSeries repository, please make sure whether you have selected your Rainmaker Deployment region, else contact the RainMaker support team. (esp-rainmaker-support@espressif.com)
- Click on the ESP-Rainmaker-TimeSeries SAR repository, the details for the repository will be displayed as below.
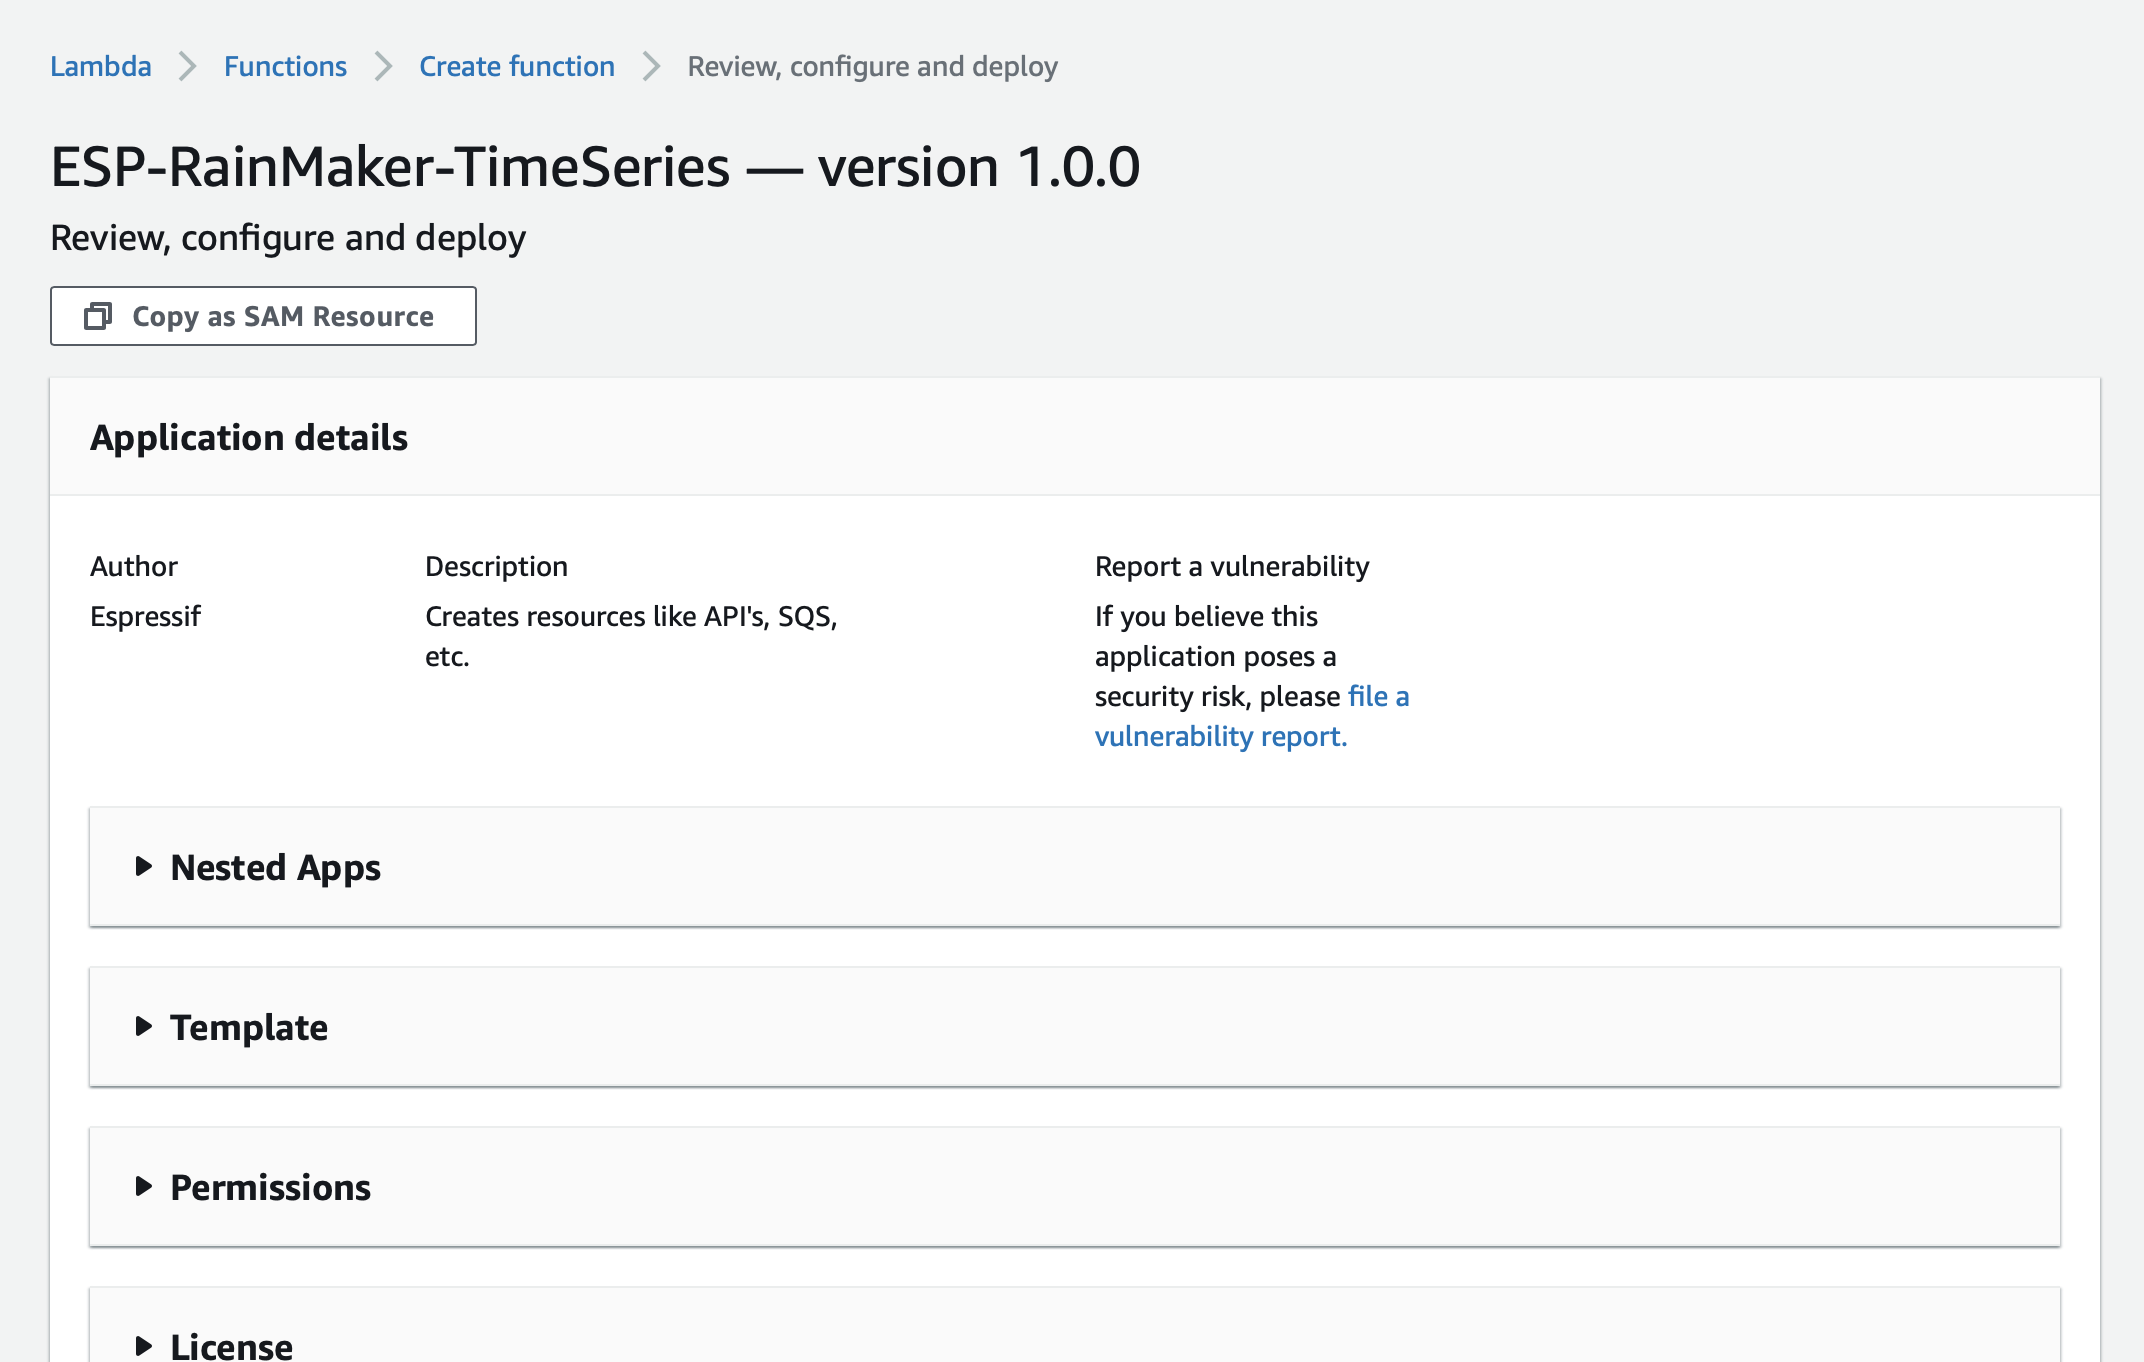
-
Scroll down and enter the values for the parameters.
- TSDataRegion - This field indicates the region where the previous base module was deployed like- us-east-1
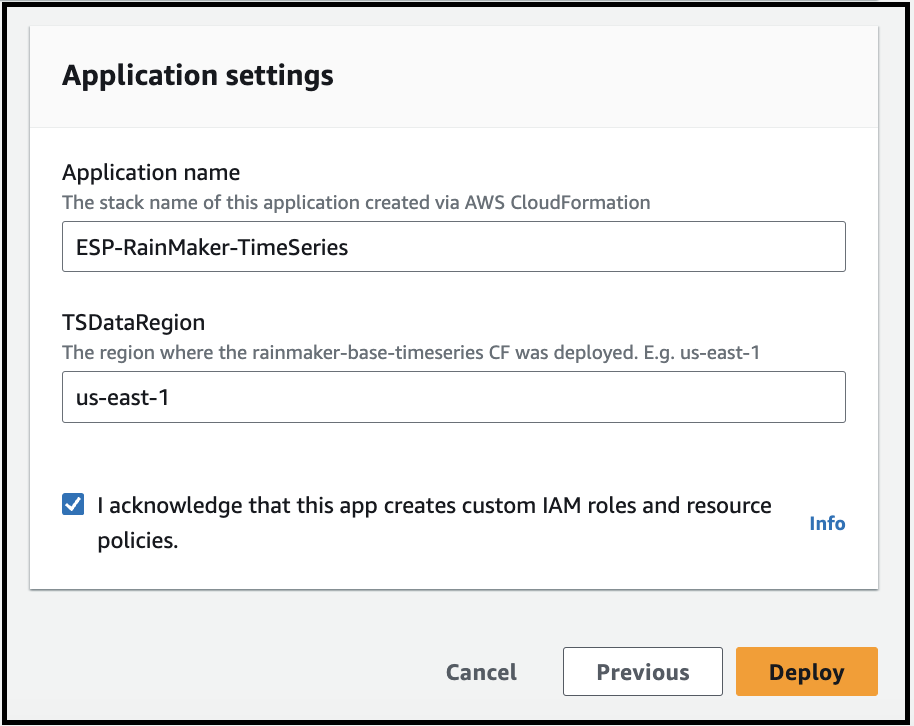
Then click on the checkbox - "I acknowledge that this app creates custom IAM roles" and click on the Deploy button.
The deployment will start and the below screen will be displayed. The deployment process will be finished in a few minutes.
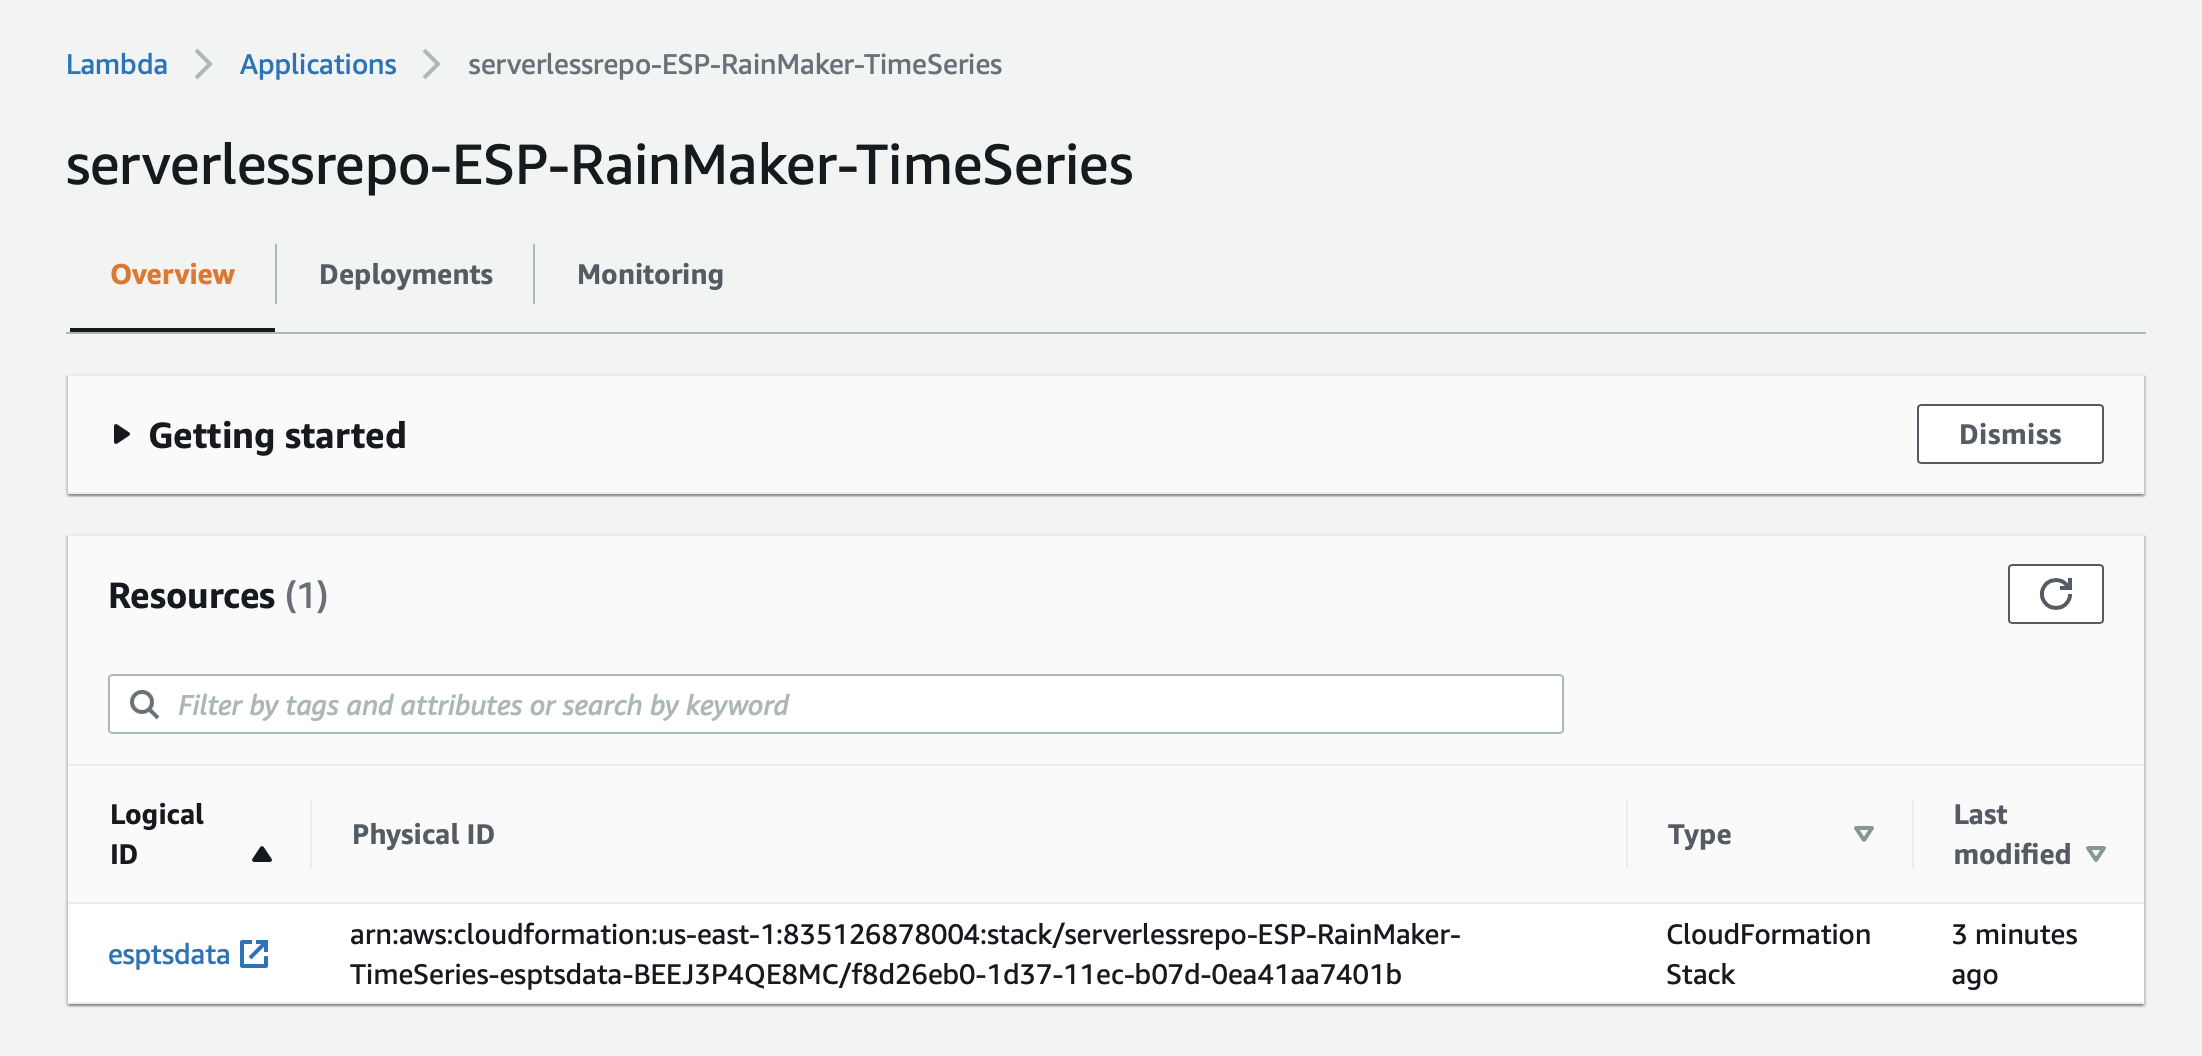
You can check the status of the deployment of this SAR repository, from CloudFormation.
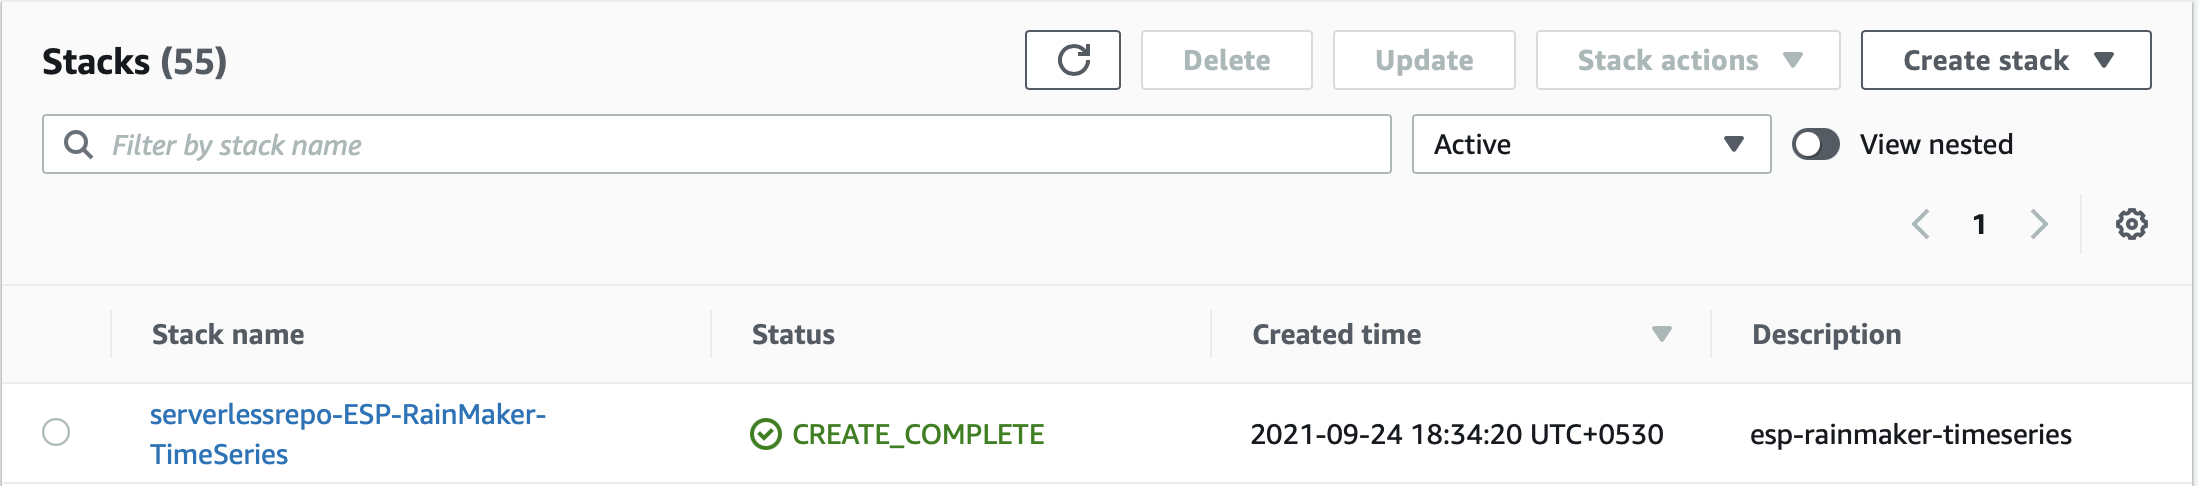
Go to AWS Console -> Services -> CloudFormation. The list of stacks deployed will be shown.
You will see an entry for the "serverlessrepo-ESP-Rainmaker-TimeSeries" stack. "CREATE_COMPLETE" status indicates that this repository is successfully deployed, as shown below.
ESP API Rate Limiter
Note: This feature is not supported for Oauth only RainMaker yet
RainMaker APIs can be protected against DoS and DDoS attacks by configuring the API rate limit. ESP API Rate Limiter service should be deployed to configure the API rate limit.
The API rate limit is the maximum number of requests from a single IP address that are allowed in a five-minute period. Requests from the IP address will be blocked once the API rate limit is reached. The IP address is automatically unblocked after it falls below the API rate limit.
The API rate limit is set to 1000 by default. The rate limit can be updated via the dashboard. There are 2 components for this service:
Deploying the Base component
The first component of the ESP API Rate Limiter service needs to be deployed using CloudFormation. The details are provided below.
- Go to AWS Management Console
- In the Services, search for CloudFormation and click on CloudFormation, as shown below.
- Select create stack on CloudFormation service, as shown below.
- If you click on "Create stack" option from stacks page, you will be prompted with two options to create stack as shown in the below image. Select option "With new resources(standard)".
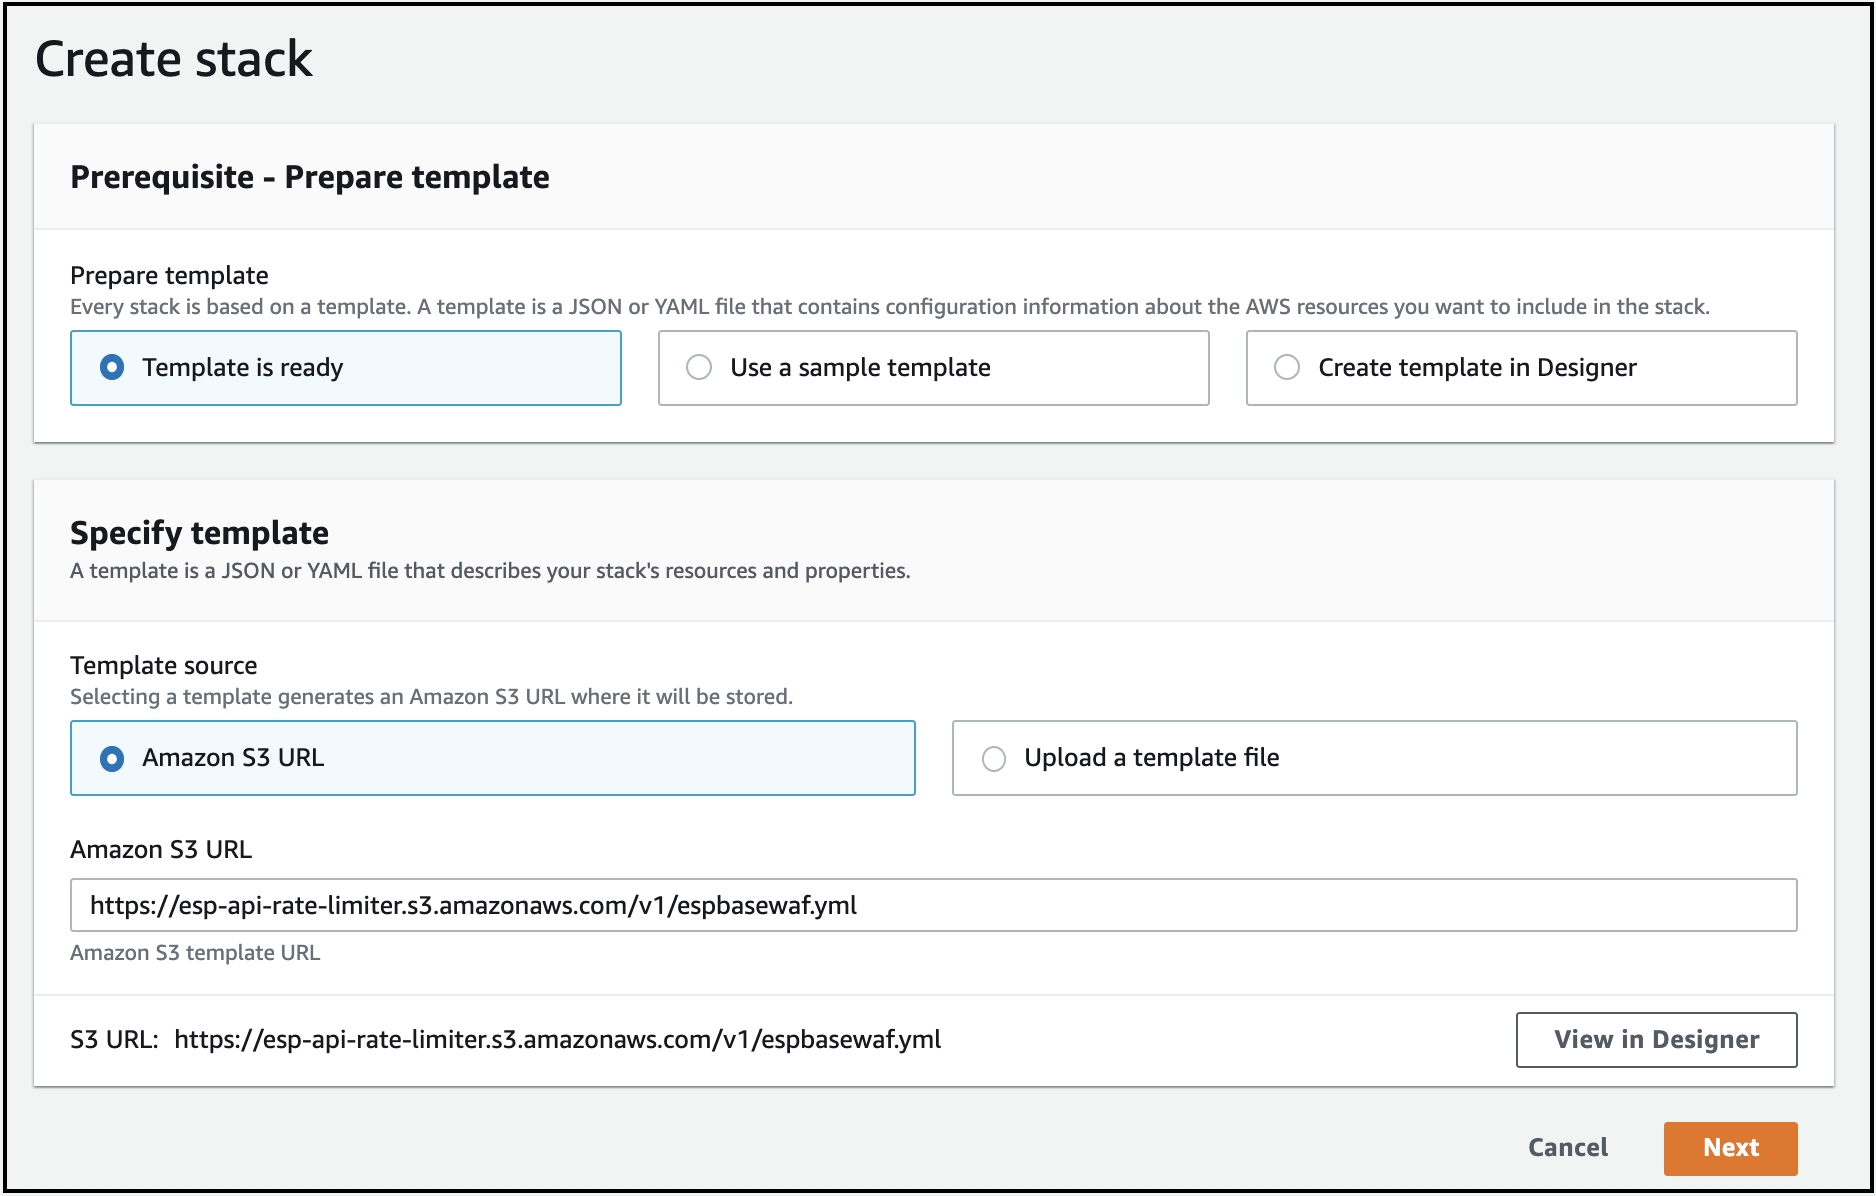
- Select the option "Template is Ready" and paste the below s3 URL in the field Amazon S3 URL, as shown below.
Amazon S3 URL: https://esp-api-rate-limiter.s3.amazonaws.com/v3/espbasewaf.yml
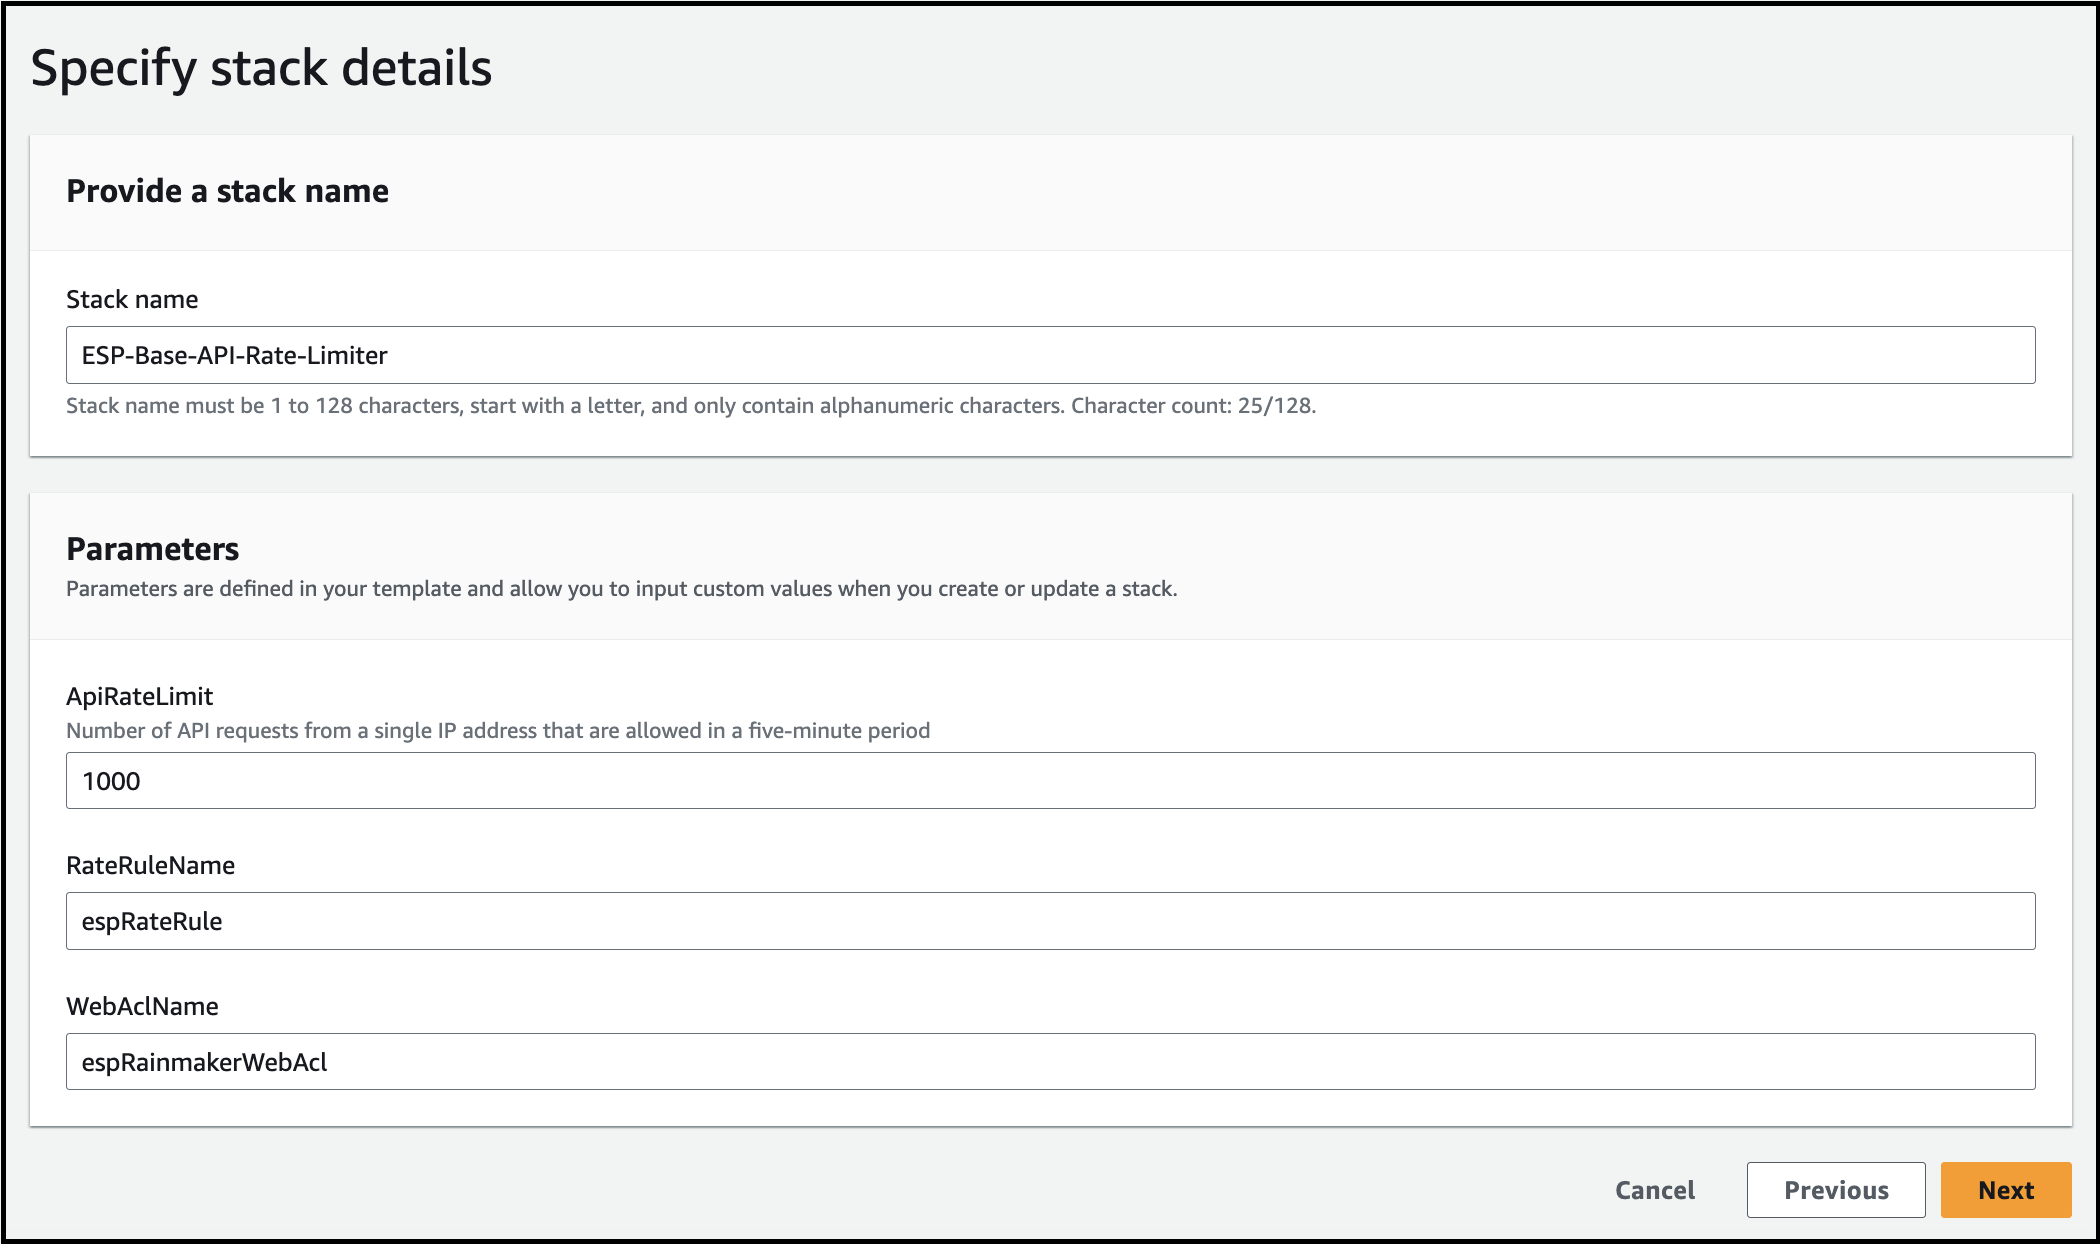
Enter stack name as ESP-Base-API-Rate-Limiter.
The default value for API rate limit is 1000. Set the value to desired rate limit. API rate limit can be updated later via the dashboard.
Enter the email address for receiving notification when the number of API requests from any IP address exceeds the API rate limit.
- Select Next and add the version tag as shown below by entering the
- Key: Version
- Value: 3
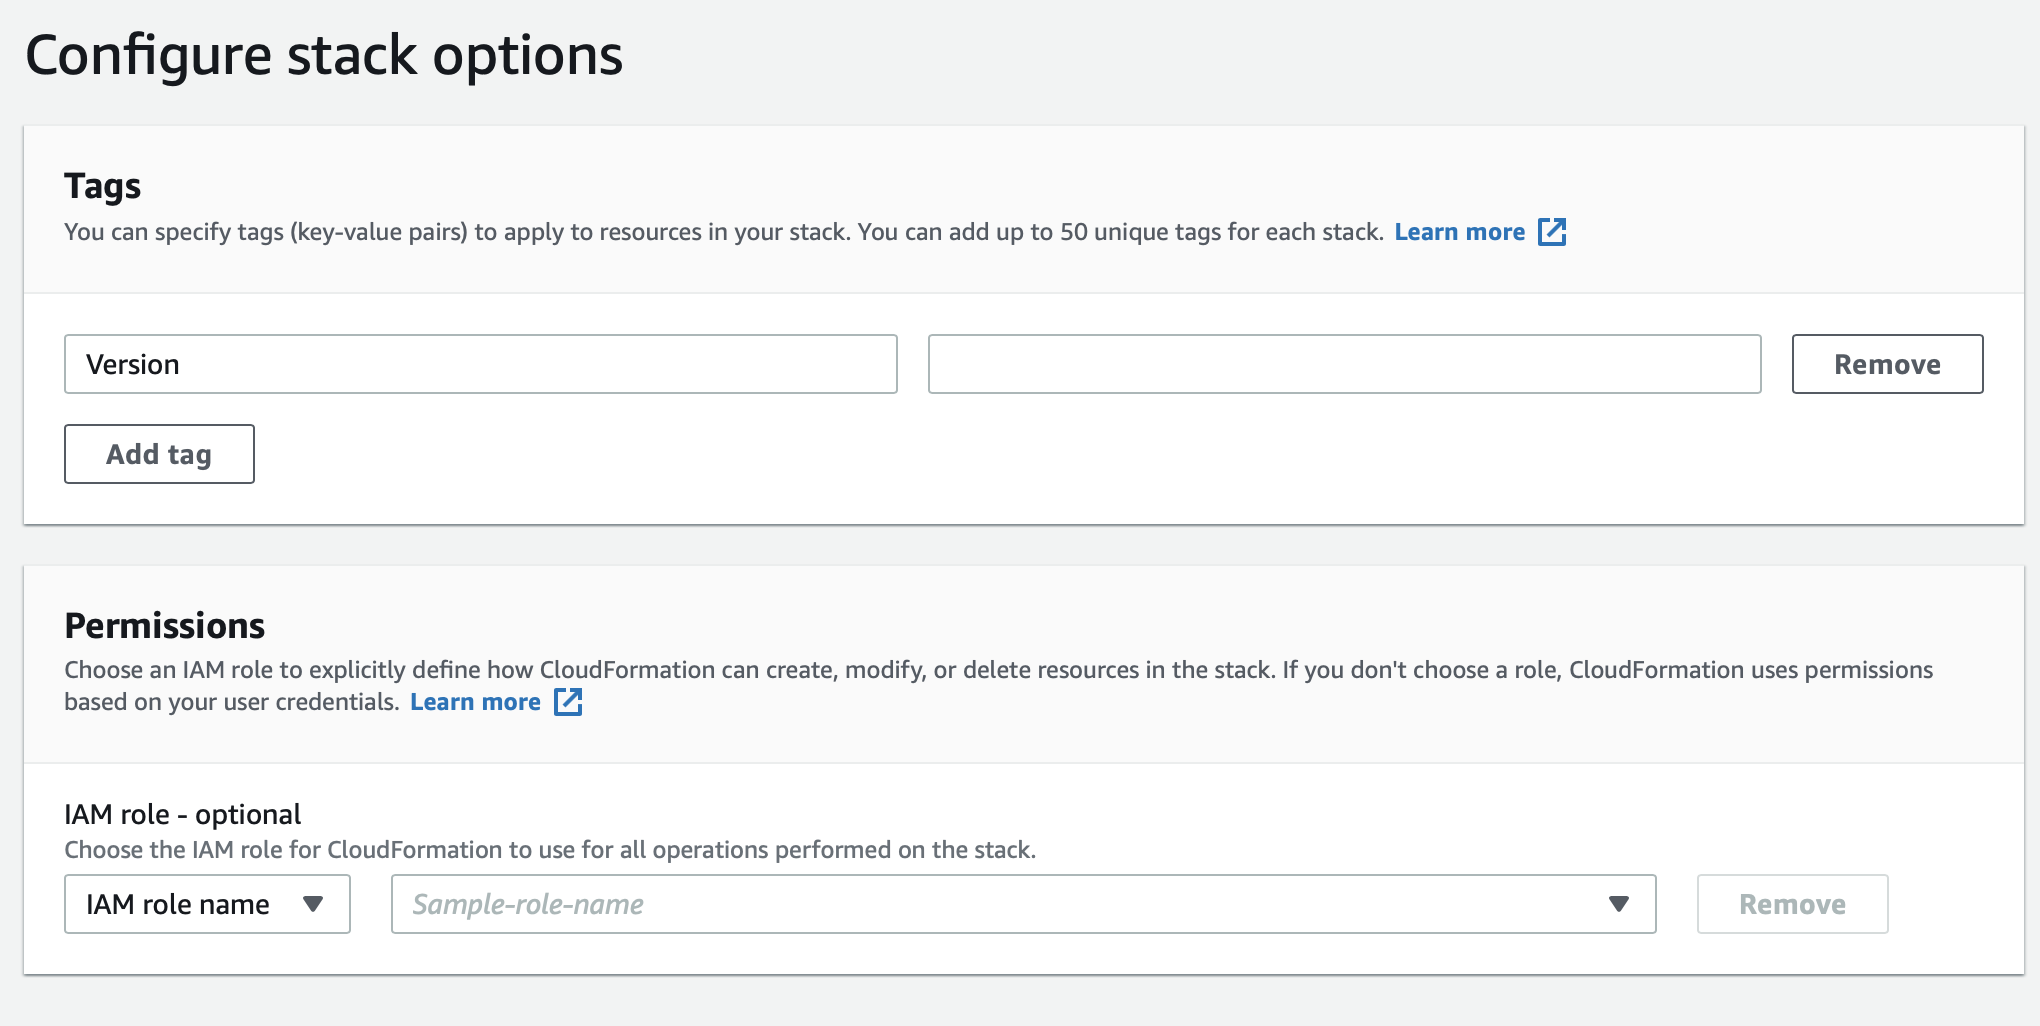
Click on the Add tag button to add it and leave the rest as default. Then click Next.
Select the below options:
I acknowledge that AWS CloudFormation might create IAM resources.
I acknowledge that AWS CloudFormation might create IAM resources with custom names.
I acknowledge that AWS CloudFormation might require the following capability: CAPABILITY_AUTO_EXPAND
And click on Create stack, as shown below.
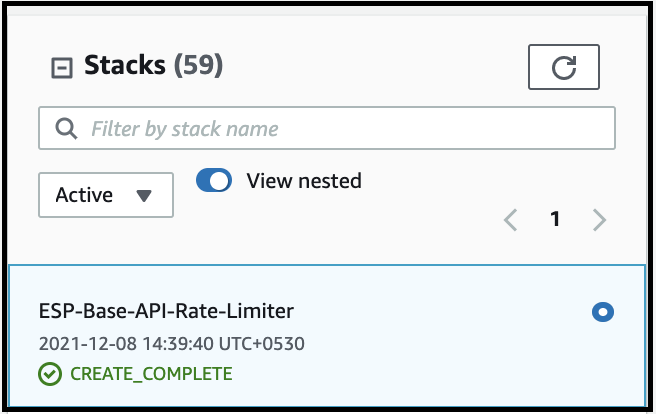
- Wait till the stack gets created, as shown below.
After the stack is deployed successfully, you will receive an email on the email address provided above, to confirm your subscription for the notifications of event of API requests from IP addresses getting blocked.
Click on confirm subscription link, to confirm your subscription
Deploying the APIs
Before proceeding, please make sure that you have selected your Rainmaker deployment region for your account.
The SAR repository for the ESP API Rate Limiter API component needs to be deployed after deploying the base component.
Steps for deploying the SAR repository -
- Login to AWS Management Console
- In the Services, search for SAR and click on SAR to navigate to SAR service, as shown below.
- Click on Available applications and select Private applications. Click the checkbox - Show apps that create custom IAM roles or resource policies.
- This is the repository that needs to be deployed.
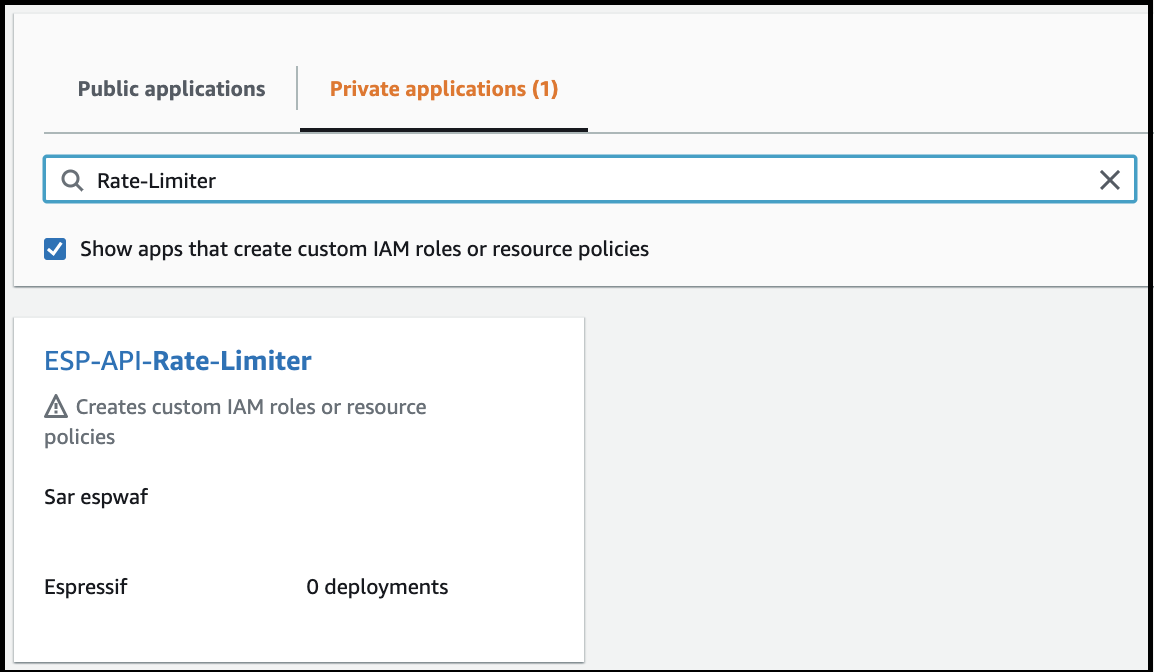
If you don’t see the ESP-API-Rate-Limiter SAR repository, please make sure whether you have selected your Rainmaker Deployment region, else contact the RainMaker support team. (esp-rainmaker-support@espressif.com)
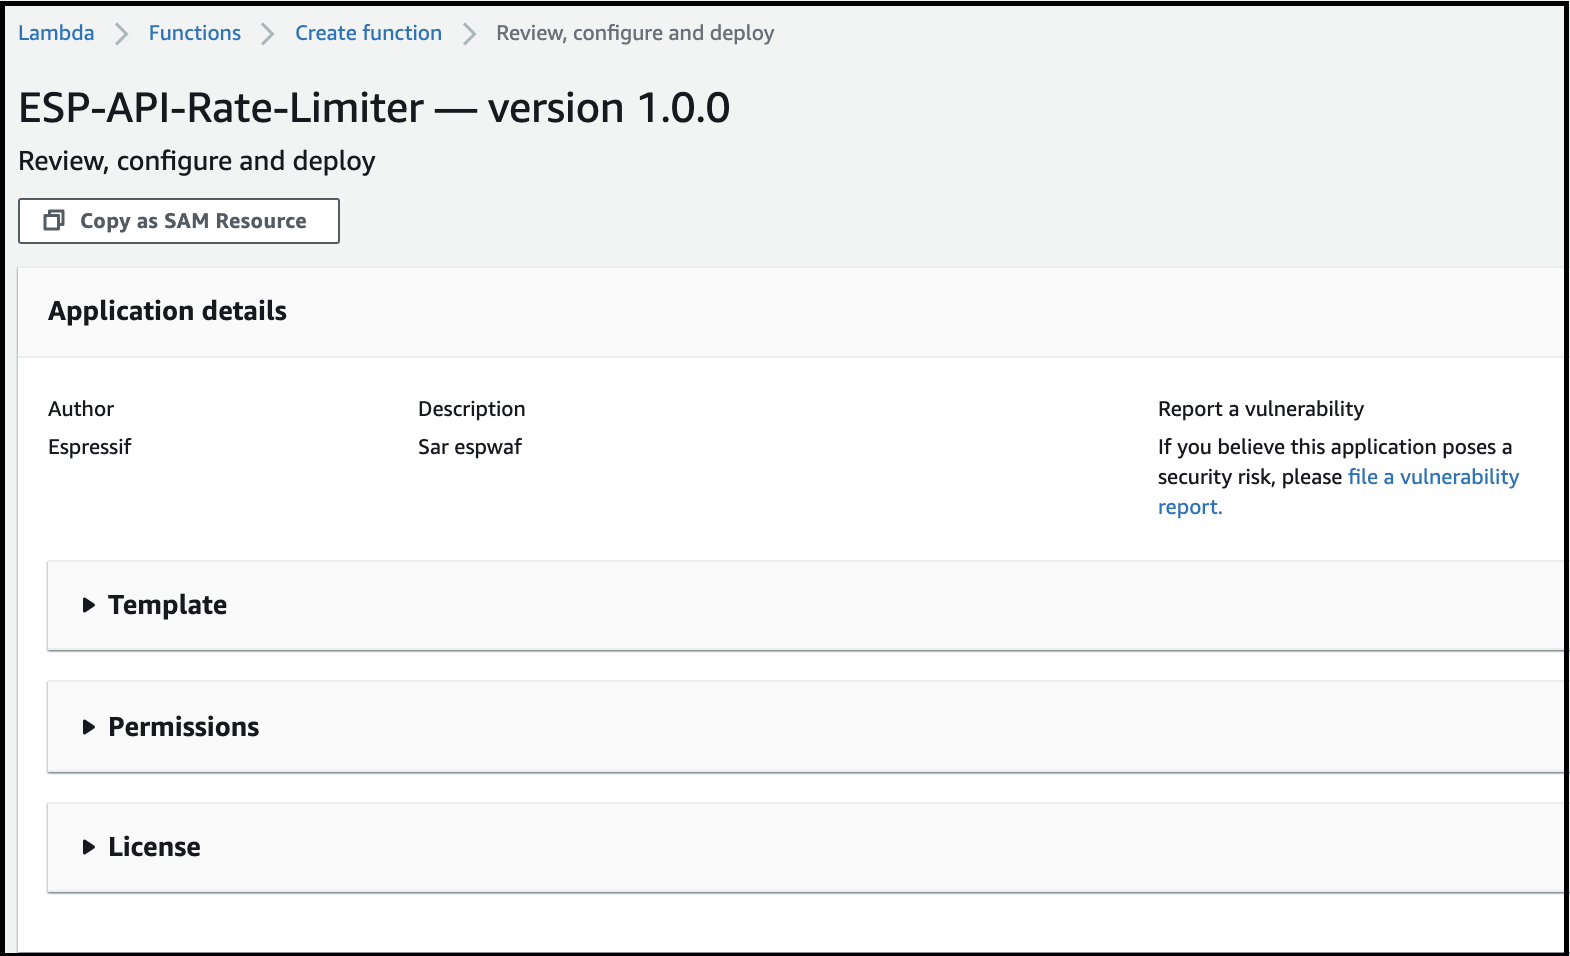
- Click on the ESP-API-Rate-Limiter SAR repository, the details for the repository will be displayed as below.
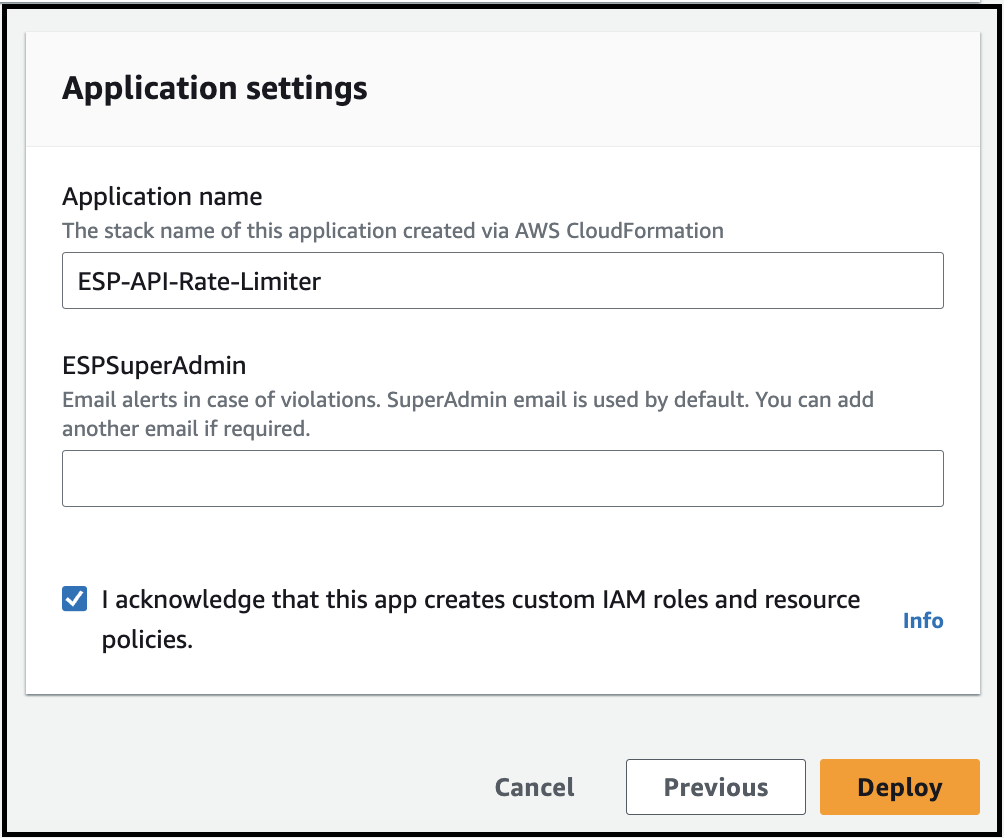
- Then click on the checkbox - "I acknowledge that this app creates custom IAM roles" and click on the Deploy button.
The deployment will be finished in a few minutes. You can check the status of the deployment of this SAR repository, from CloudFormation.
Go to AWS Console -> Services -> CloudFormation. The list of stacks deployed will be shown.
You will see an entry for the "serverlessrepo-ESP-API-Rate-Limiter" stack. "CREATE_COMPLETE" status indicates that this repository is successfully deployed, as shown below.

- Done
ESP Device Defender
The Device Defender module helps mitigate security risks for IoT devices connected to RainMaker by detecting the unusual behaviors by the connected device that might indicate a compromised device. The alarm is raised when unusual behavior is indicated. Following is the list of behavior that will raise the alarm:
- Connection attempts per device per five-minute period exceed the threshold value set for connection attempts.
- Authorization failures per device per five-minute period exceed the threshold value set for authorization failures.
- Messages sent per device per five-minute period exceed the threshold value set for messages sent.
If the device exceeds the threshold values for the above three rules, an email alert is sent to the super-admin email address. The threshold values for the above three rules can be specified while deploying the module.
This module needs to be deployed separately. The steps to deploy Device Defender modules are given below.
Before proceeding, please make sure you have selected your Rainmaker deployment region for your account.
Deploying the Service
- Login to AWS Management Console
- In the Services, search for SAR and click on SAR to navigate to SAR service, as shown below.
- Click on Available applications and select "Private applications". Click the checkbox - Show apps that create custom IAM roles or resource policies.
- This is the repository that needs to be deployed.
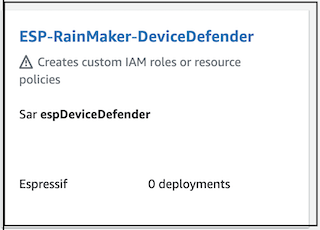
If you can't see the ESP-RainMaker-DeviceDefender SAR repository, please make sure you have selected your Rainmaker Deployment region, else contact the RainMaker support team. (esp-rainmaker-support@espressif.com)
- Click on the ESP-RainMaker-DeviceDefender SAR repository, the details for the repository will be displayed as shown below.
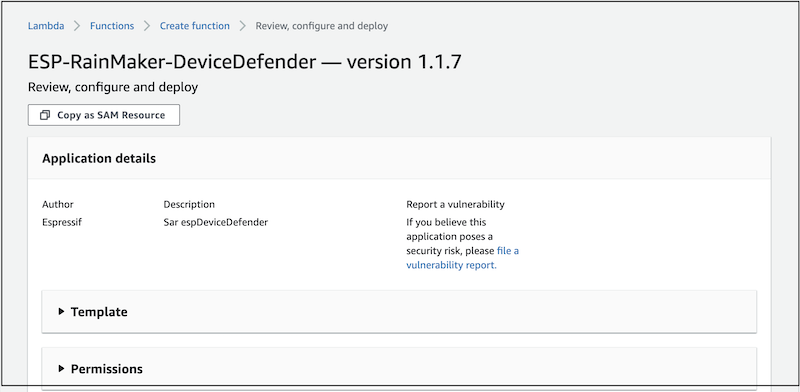
- Scroll down to the "Application settings"
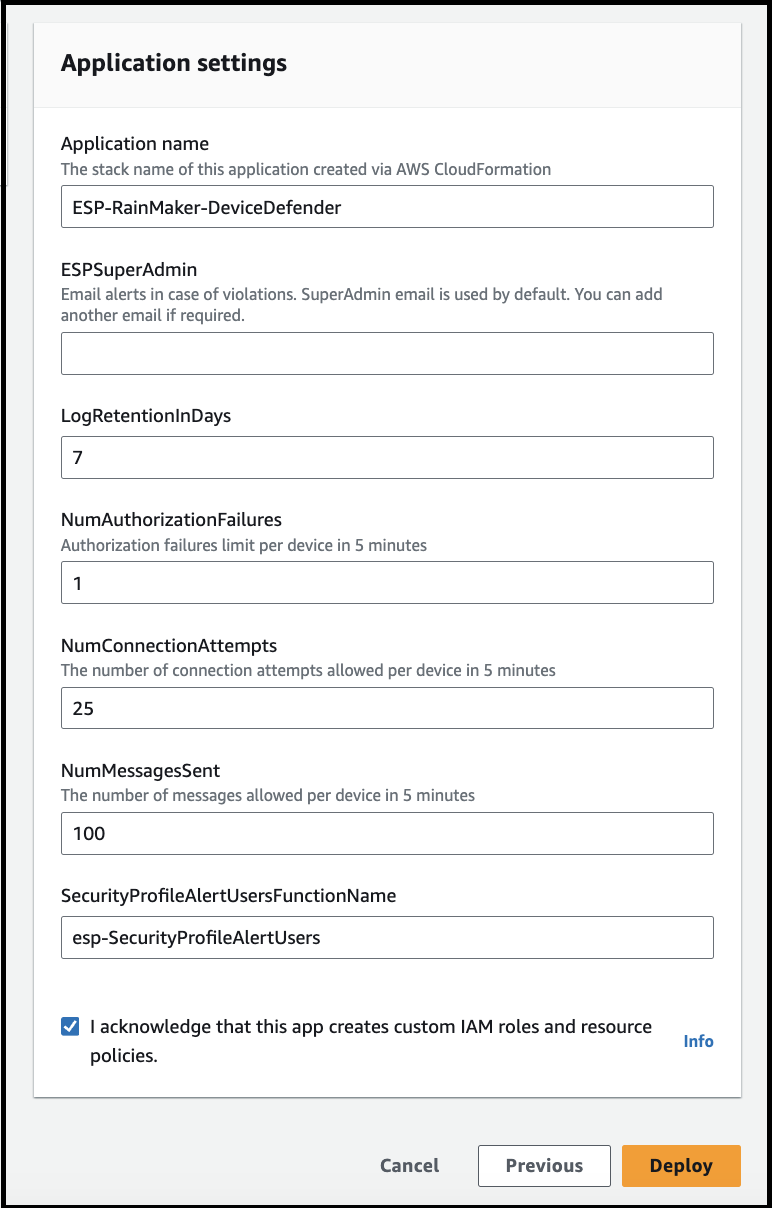
For ESPSuperAdmin, enter the email address to receive the email alerts about rule violations by the device. If this field is kept empty, email alerts will be sent to the SuperAdmin email address.
NumAuthorizationFailures, NumConnectionAttempts, NumMessagesSent values are the threshold values allowed for the number of authorization failures per device per five-minute period, the number of connection attempts per device per five-minute period, and the number of messages sent per device per five-minute period. If the device exceeds the specified threshold values, an email alert will be sent to the specified email address. Enter the required values for the parameters.
Click on the checkbox - "I acknowledge that this app creates custom IAM roles" and click on the Deploy button.
The deployment will be finished in a few minutes. You can check the status of the deployment of this SAR repository, from CloudFormation.
Go to AWS Console -> Services -> CloudFormation. The list of stacks deployed will be shown.
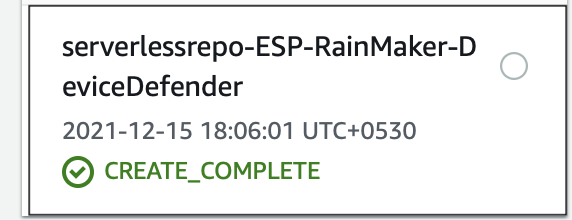
You will see an entry for the "serverlessrepo-ESP-RainMaker-DeviceDefender" stack. "CREATE_COMPLETE" status indicates that this repository is successfully deployed, as shown below.
ESP Access Logs
The ESP Access Logs service is used for logging and retrieving the API Data as well as MQTT Topics Message Data for ESP RainMaker Cloud Platform. There is only one component for this service:
Deploying the Access Logs
Before proceeding please make sure that you have selected your Rainmaker deployment region for your account.
Steps for deploying the SAR repository -
- Login to AWS Management Console
- In the Services, search for SAR and click on SAR to navigate to SAR service, as shown below.
- Click on Available applications and select Private applications. Click the checkbox - Show apps that create custom IAM roles or resource policies.
- This is the repository that needs to be deployed.
If you don’t see the RainMaker Access Logs repository, please make sure whether you have selected your Rainmaker Deployment region, else contact the RainMaker support team. (esp-rainmaker-support@espressif.com)
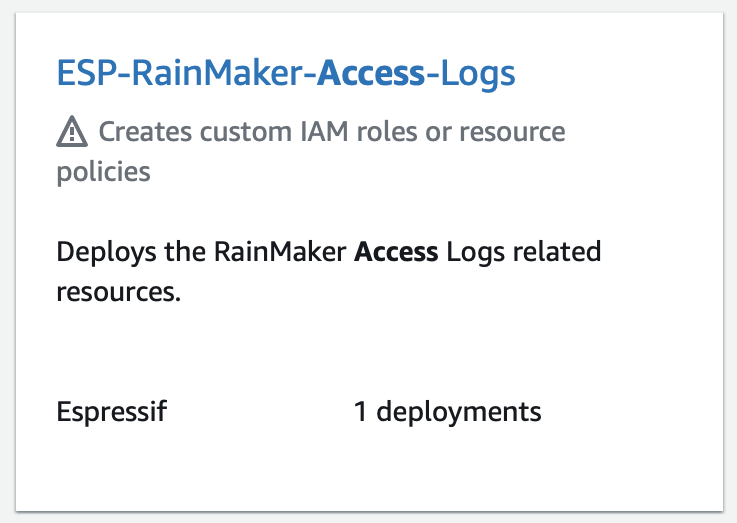
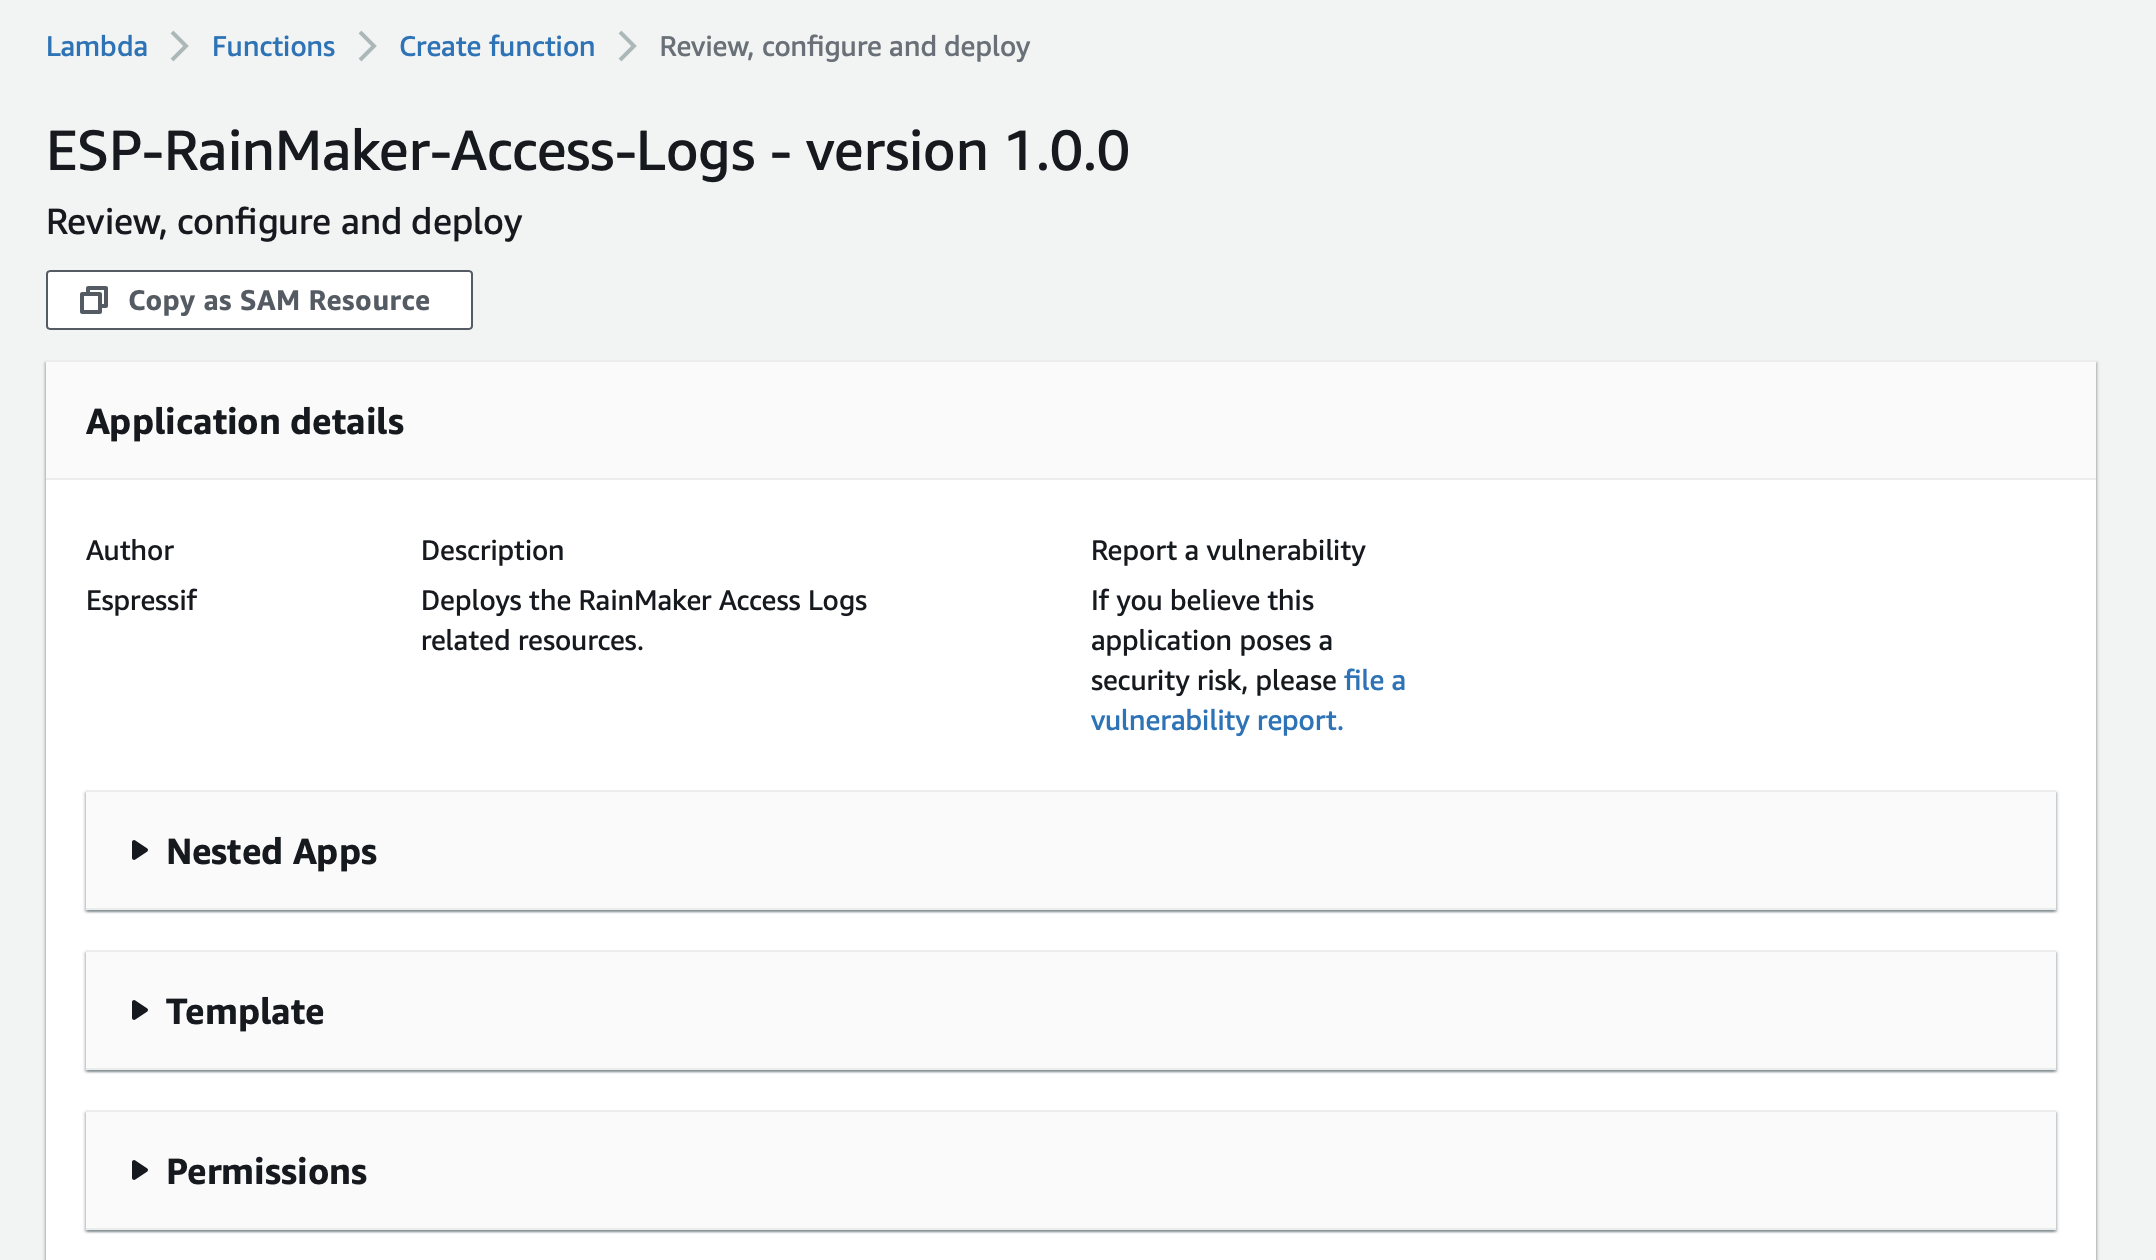
- Click on the ESP-RainMaker-Access-Logs SAR repository, the details for the repository will be displayed as below.
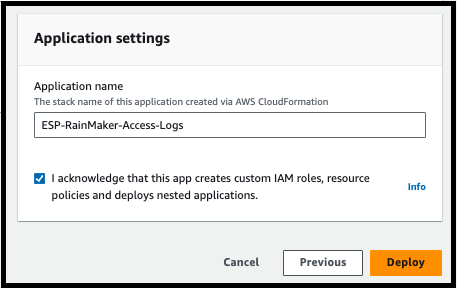
Then click on the checkbox - "I acknowledge that this app creates custom IAM roles" and click on the Deploy button.
The deployment will start and the below screen will be displayed. The deployment process will be finished in a few minutes.
You can check the status of the deployment of this SAR repository, from CloudFormation.
Go to AWS Console -> Services -> CloudFormation. The list of stacks deployed will be shown.
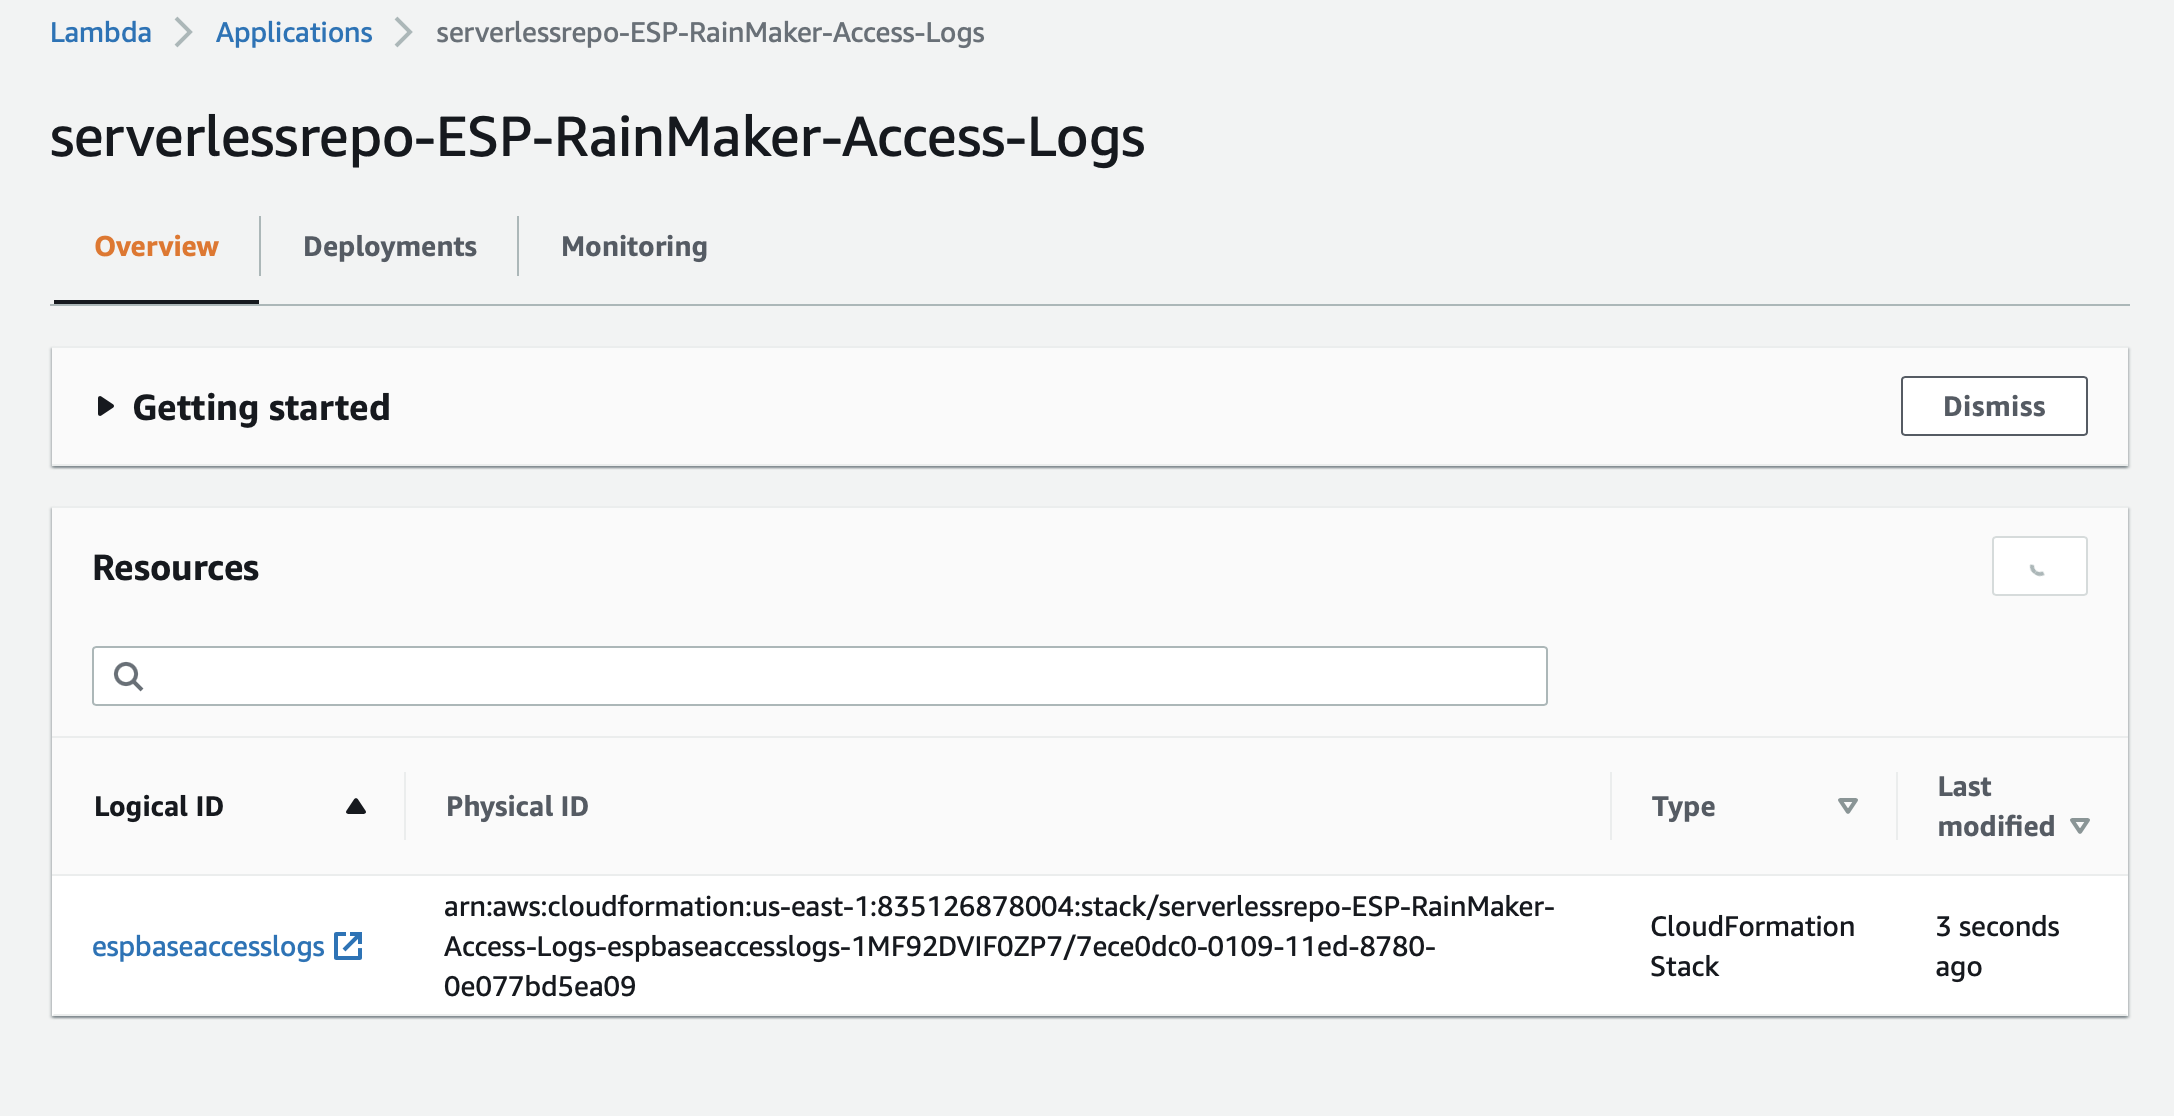
You will see an entry for the "serverlessrepo-ESP-RainMaker-Access-Logs" stack. "CREATE_COMPLETE" status indicates that this repository is successfully deployed, as shown below.
